Sunday, 13 December 2020

Angular PrimeNG checkboxes styling and events handling

December 13, 2020 0


Angular PrimeNG checkboxes styling and events handling

Getting Started With PrimeNG Styling in Angular App


This chapter I am planning to show how you can handle events of the checkboxes. For that I will use checkbox for every card to place the order. 

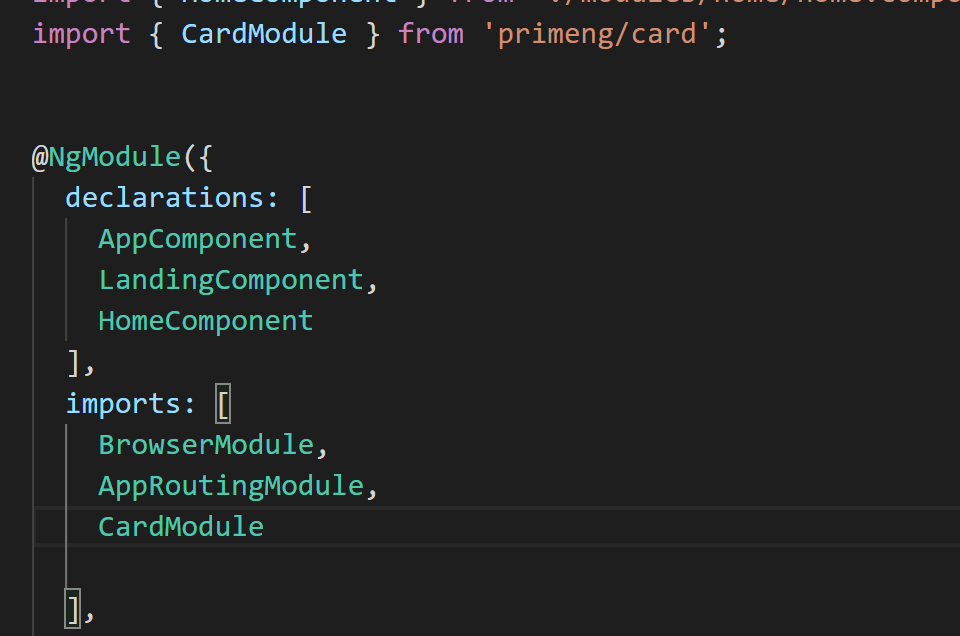
To use PrimeNG checkboxes you have to import checkbox module in app.module.ts file.


import {CheckboxModule} from 'primeng/checkbox';


import { BrowserModule } from '@angular/platform-browser';
import { NgModule } from '@angular/core';

import { AppRoutingModule } from './app-routing.module';
import { AppComponent } from './app.component';
import { LandingComponent } from './modules/landing/landing.component';
import { HomeComponent } from './modules/home/home.component';
import { CardModule } from 'primeng/card';
import {CheckboxModule} from 'primeng/checkbox';

@NgModule({
  declarations: [
    AppComponent,
    LandingComponent,
    HomeComponent
  ],
  imports: [
    BrowserModule,
    AppRoutingModule,
    CardModule,
    CheckboxModule
    
  ],
  providers: [],
  bootstrap: [AppComponent]
})
export class AppModule { }


Then you must import checkbox module inside your component.ts file to use it inside the html template.


import { Component, OnInit, ViewEncapsulation } from '@angular/core';
import { flower } from '../../domain/flower';
import {CardModule} from 'primeng/card';
import {CheckboxModule} from 'primeng/checkbox';

@Component({
  selector: 'app-landing',
  templateUrl: './landing.component.html',
  styleUrls: ['./landing.component.scss'],
  encapsulation: ViewEncapsulation.None
})
export class LandingComponent implements OnInit {


I have added checkbox PrimeNG component inside my flower card as below.


<h1>Welcome to my flower store</h1>

<div *ngFor="let flower of myFlowerList;trackBy:trackFlowers">
        <p-card header="{{flower.name}}"  [style]="{width: '360px','float':'left','margin-bottom': '2em','margin-right': '2em','background-color':'light-pink'}" styleClass="p-card-shadow">
                <img alt="Card" width="100" height="100" src="assets/stock/{{flower.name}}.jpg">
            <p>Lorem ipsum dolor sit amet, consectetur adipisicing elit. Inventore sed consequuntur error repudiandae numquam deserunt
                quisquam repellat libero asperiores earum nam nobis, culpa ratione quam perferendis esse, cupiditate neque quas!</p>
                <p-checkbox name="flower" [style]="{'margin-top': '2em'}" value="{{flower.name}}" label="Order Now" [(ngModel)]="selectedFlowers"></p-checkbox>
             
            </p-card>
    </div>


As a checkbox value I set the name property of flower object

value="{{flower.name}}" 

[(ngModel)] directive is supporting two-way binding in angular.

Two-way data binding in Angular will help users to exchange data from the component to view and from view to the component. It will help users to establish communication bi-directionally.

In order to use ngModel directive we must import the FormsModule from @angular/forms in app.module.ts file as shown below.


import { BrowserModule } from '@angular/platform-browser';
import { NgModule } from '@angular/core';

import { AppRoutingModule } from './app-routing.module';
import { AppComponent } from './app.component';
import { LandingComponent } from './modules/landing/landing.component';
import { HomeComponent } from './modules/home/home.component';
import { CardModule } from 'primeng/card';
import {CheckboxModule} from 'primeng/checkbox';
import { CommonModule } from '@angular/common';
import { FormsModule }    from '@angular/forms';

@NgModule({
  declarations: [
    AppComponent,
    LandingComponent,
    HomeComponent
  ],
  imports: [
    BrowserModule,
    AppRoutingModule,
    CardModule,
    CheckboxModule,
    CommonModule,
    FormsModule
    
  ],
  providers: [],
  bootstrap: [AppComponent]
})
export class AppModule { }


If you don’t import it you will get the template binding as below in your console.

Uncaught Error: Template parse errors:
Can't bind to 'ngModel' since it isn't a known property of 'p-checkbox'.

1. If 'p-checkbox' is an Angular component and it has 'ngModel' input, then verify that it is part of this module.

2. If 'p-checkbox' is a Web Component then add 'CUSTOM_ELEMENTS_SCHEMA' to the '@NgModule.schemas' of this component to suppress this message.

3. To allow any property add 'NO_ERRORS_SCHEMA' to the '@NgModule.schemas' of this component. ("<p-checkbox name="flower" [style]="{'margin-top': '2em'}" value="{{flower.name}}" label="Order Now" [ERROR ->][(ngModel)]="selectedFlowers"></p-checkbox>


can't bind to 'ngmodel' since it isn't a known property of 'p-checkbox'.


After that in my component.ts file I have defined the array to use in two-way binding.


import { Component, OnInit, ViewEncapsulation } from '@angular/core';
import { flower } from '../../domain/flower';
import {CardModule} from 'primeng/card';
import {CheckboxModule} from 'primeng/checkbox';

@Component({
  selector: 'app-landing',
  templateUrl: './landing.component.html',
  styleUrls: ['./landing.component.scss'],
  encapsulation: ViewEncapsulation.None
})
export class LandingComponent implements OnInit {

  myFlowerList:flower[]=[];
  selectedFlowers: string[] = [];
  constructor() { }

  ngOnInit() {
    this.mySellingFlowers();
  }

  mySellingFlowers(){
    let rose = new flower();
    rose.name = "Rose";
    rose.price = 100;
    rose.availableQuantity = 1000;
    this. myFlowerList.push(rose);

    let lily = new flower();
    lily.name = "Lilly";
    lily.price = 80;
    lily.availableQuantity = 2000;
    this. myFlowerList.push(lily);

    let tulip = new flower();
    tulip.name = "Tulip";
    tulip.price = 100;
    tulip.availableQuantity = 2300;
    this. myFlowerList.push(tulip);

    let carnation = new flower();
    carnation.name = "Carnation";
    carnation.price = 50;
    carnation.availableQuantity = 1500;
    this. myFlowerList.push(carnation);

    let gerbera = new flower();
    gerbera.name = "Gerbera";
    gerbera.price = 50;
    gerbera.availableQuantity = 1500;
    this. myFlowerList.push(gerbera);

    let orchid = new flower();
    orchid.name = "Orchid";
    orchid.price = 50;
    orchid.availableQuantity = 1500;
    this. myFlowerList.push(orchid);

  }

  trackFlowers(index,flower){
    return flower?flower.name:undefined
  }
}


Now I will display the value of this array in my html file as below.


<div>You have ordered:</div>
    <ul>
        <li *ngFor="let selectedFlower of selectedFlowers">
            {{selectedFlower}}

        </li>
    </ul>


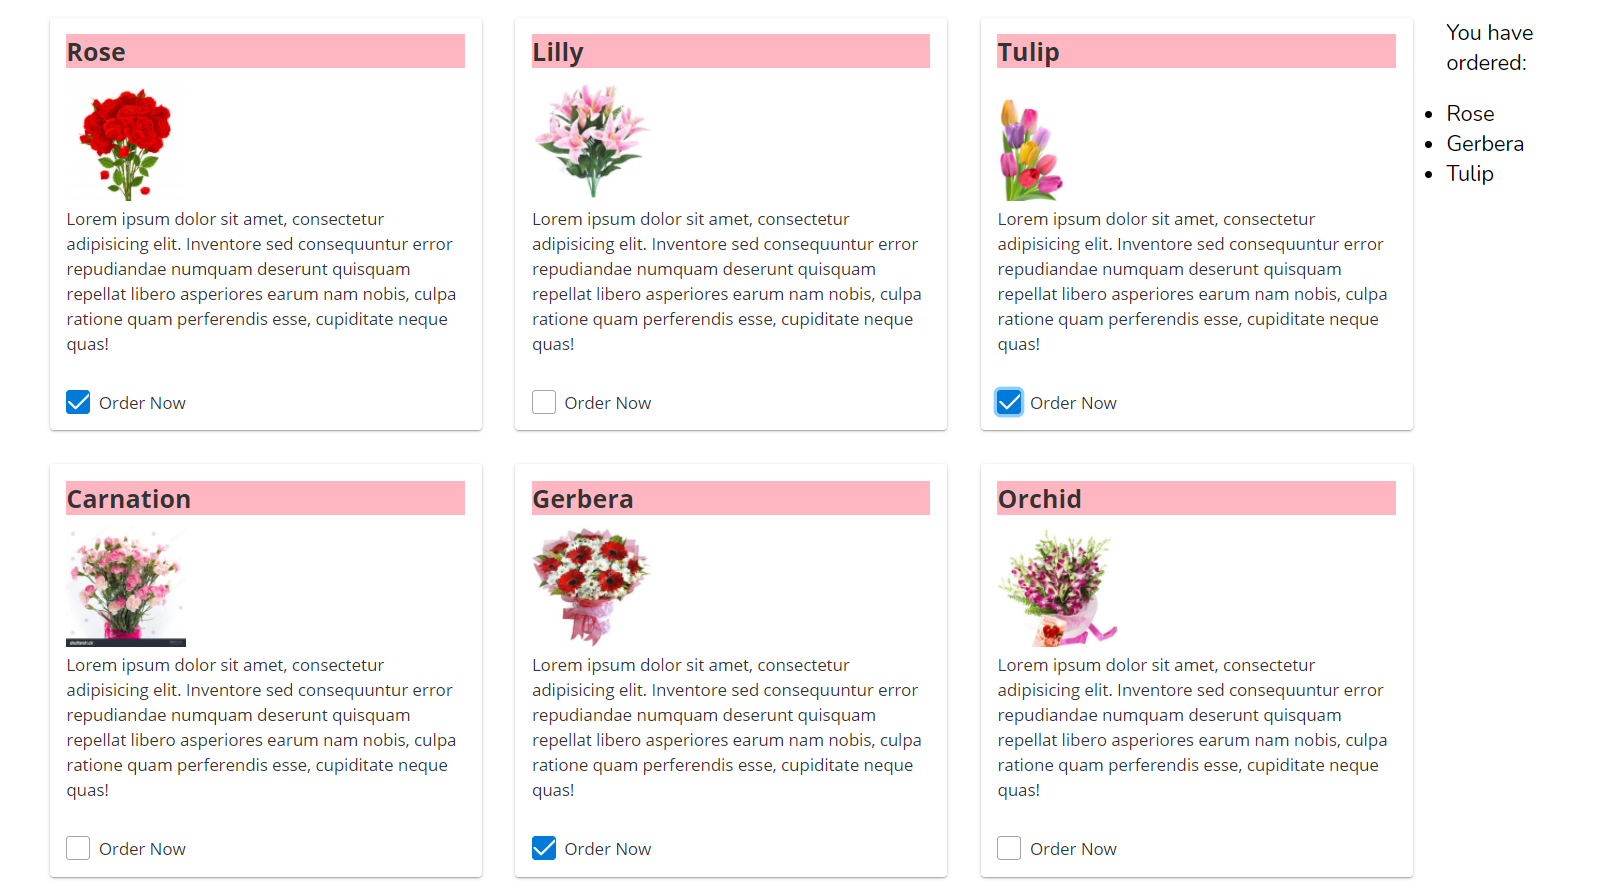
Now we have done all the coding. You will see the name of the flower in your browser is showing and hiding based on check or uncheck event of the checkboxes.


primeng check / uncheck of checkbox example - flower app


PrimeNG UI Components For Angular Application

December 13, 2020 0
PrimeNG UI Components For Angular 9 Application

Getting Started With PrimeNG Styling in Angular App


 This chapter we are going to check how you can add PrimeNG card component to show available flowers in the stock. Before styling the app, I have added some images of flowers to our assets folder as below.


images in assets folder in angular app

In app.module.ts file you can import PrimeNG Card module as below.


import { BrowserModule } from '@angular/platform-browser';

import { NgModule } from '@angular/core';


import { AppRoutingModule } from './app-routing.module';

import { AppComponent } from './app.component';

import { LandingComponent } from './modules/landing/landing.component';

import { HomeComponent } from './modules/home/home.component';

import { CardModule } from 'primeng/card';

;


@NgModule({

  declarations: [

    AppComponent,

    LandingComponent,

    HomeComponent

  ],

  imports: [

    BrowserModule,

    AppRoutingModule,

    CardModule,


  ],

  providers: [],

  bootstrap: [AppComponent]

})

export class AppModule { }


import card module from primeng/card


Then you have to import card module in landing.component.ts file also.


import { Component, OnInit } from '@angular/core';

import { flower } from '../../domain/flower';

import {CardModule} from 'primeng/card';


@Component({

  selector: 'app-landing',

  templateUrl: './landing.component.html',

  styleUrls: ['./landing.component.scss']

})

export class LandingComponent implements OnInit {


  myFlowerList:flower[]=[];

  constructor() { }

  ngOnInit() {

    this.mySellingFlowers();

  }


  mySellingFlowers(){

    let rose = new flower();

    rose.name = "Rose";

    rose.price = 100;

    rose.availableQuantity = 1000;

    this. myFlowerList.push(rose);


    let lily = new flower();

    lily.name = "Lilly";

    lily.price = 80;

    lily.availableQuantity = 2000;

    this. myFlowerList.push(lily);


    let tulip = new flower();

    tulip.name = "Tulip";

    tulip.price = 100;

    tulip.availableQuantity = 2300;

    this. myFlowerList.push(tulip);


    let carnation = new flower();

    carnation.name = "Carnation";

    carnation.price = 50;

    carnation.availableQuantity = 1500;

    this. myFlowerList.push(carnation);


    let gerbera = new flower();

    gerbera.name = "Gerbera";

    gerbera.price = 50;

    gerbera.availableQuantity = 1500;

    this. myFlowerList.push(gerbera);


    let orchid = new flower();

    orchid.name = "Orchid";

    orchid.price = 50;

    orchid.availableQuantity = 1500;

    this. myFlowerList.push(orchid);

  }

}


   trackFlowers(index,flower){

    return flower?flower.name:undefined

  }

  }


Then you can use PrimeNG card module inside your component.html file as below.


<h1>Welcome to my flower store</h1>

<div *ngFor="let flower of myFlowerList;trackBy:trackFlowers">

        <p-card header="{{flower.name}}"  [style]="{width: '360px','float':'left','margin-bottom': '2em','margin-right': '2em','background-color':'light-pink'}" styleClass="p-card-shadow">

                <img alt="Card" width="100" height="100" src="assets/stock/{{flower.name}}.jpg">

            <p>Lorem ipsum dolor sit amet, consectetur adipisicing elit. Inventore sed consequuntur error repudiandae numquam deserunt

                quisquam repellat libero asperiores earum nam nobis, culpa ratione quam perferendis esse, cupiditate neque quas!</p>

                   </p-card>

    </div>


I have changed background styles in the banner in style.scss file.  


@import url('https://fonts.googleapis.com/css family=Nunito:400,700&display=swap');


$primary: indianred;


body {

    margin: 0;

    font-family: 'Nunito', 'sans-serif';

    font-size: 18px;

}


.container {

    width: 80%;

    margin: 0 auto;

}


header {

    background: $primary;

    padding: 1em 0;


    a {

        color: white;

        text-decoration: none;

        font-size: larger;

    }

    a.logo {

        font-weight: bold;

        color: white;

        font-size: larger;

    }


    nav {

        float: right;


        ul {

            list-style-type: none;

            margin: 0;

            display: flex;


            li a {

                padding: 1em;

                color:white;

                font-weight: bold;

                &:hover {

                    background: darken($primary, 10%);

                }

            }

        }

    }

}


h1 {

    margin-top: 2em;

}


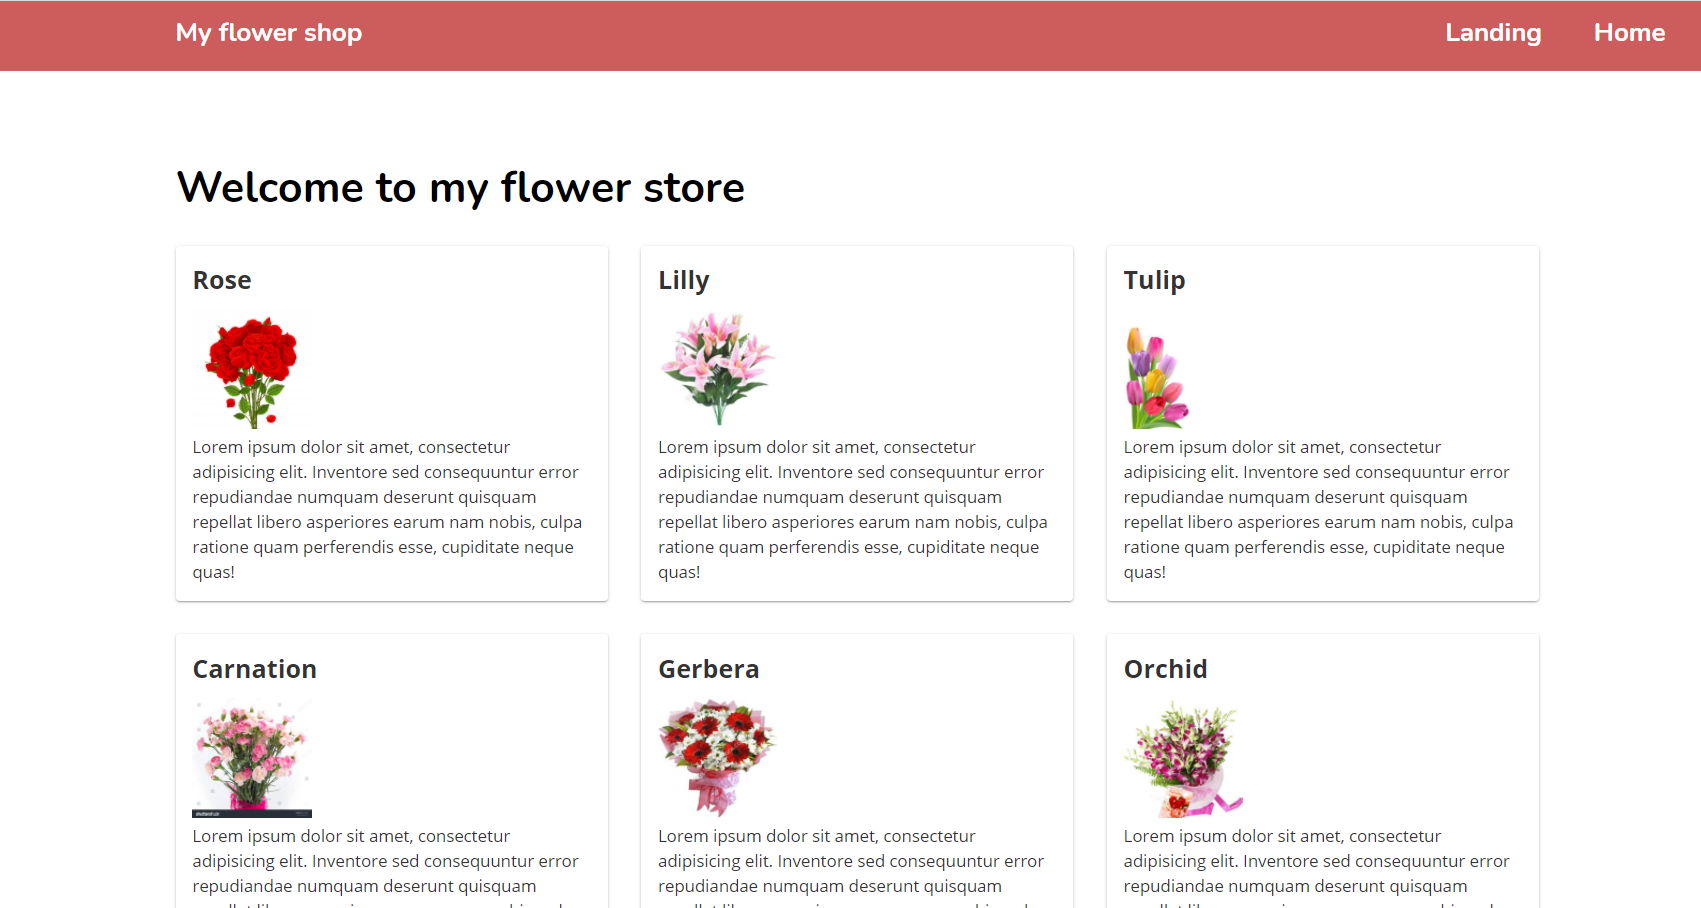
Once you apply PrimeNG cards modules, app will look like below.


PrimeNG cards modules styles css example - flower store app


Let’s give a background color to the card title. For that you must override ui-card-title CSS inside your landing.component.scss file as below.
.ui-card-title{
    background-color: lightpink !important;
}


.ui-card-title css is defined inside primeng.min.scss file. To override it you must put below line of code in your landing.component.ts file.


import { Component, OnInit, ViewEncapsulation } from '@angular/core';
import { flower } from '../../domain/flower';
import {CardModule} from 'primeng/card';

@Component({
  selector: 'app-landing',
  templateUrl: './landing.component.html',
  styleUrls: ['./landing.component.scss'],
  encapsulation: ViewEncapsulation.None
})
export class LandingComponent implements OnInit {

  myFlowerList:flower[]=[];
  constructor() { }

  ngOnInit() {
    this.mySellingFlowers();
  }

  mySellingFlowers(){
    let rose = new flower();
    rose.name = "Rose";
    rose.price = 100;
    rose.availableQuantity = 1000;
    this. myFlowerList.push(rose);

    let lily = new flower();
    lily.name = "Lilly";
    lily.price = 80;
    lily.availableQuantity = 2000;
    this. myFlowerList.push(lily);

    let tulip = new flower();
    tulip.name = "Tulip";
    tulip.price = 100;
    tulip.availableQuantity = 2300;
    this. myFlowerList.push(tulip);

    let carnation = new flower();
    carnation.name = "Carnation";
    carnation.price = 50;
    carnation.availableQuantity = 1500;
    this. myFlowerList.push(carnation);

    let gerbera = new flower();
    gerbera.name = "Gerbera";
    gerbera.price = 50;
    gerbera.availableQuantity = 1500;
    this. myFlowerList.push(gerbera);

    let orchid = new flower();
    orchid.name = "Orchid";
    orchid.price = 50;
    orchid.availableQuantity = 1500;
    this. myFlowerList.push(orchid);

  }

  trackFlowers(index,flower){
    return flower?flower.name:undefined
  }
}


primeng landing.component.ts file


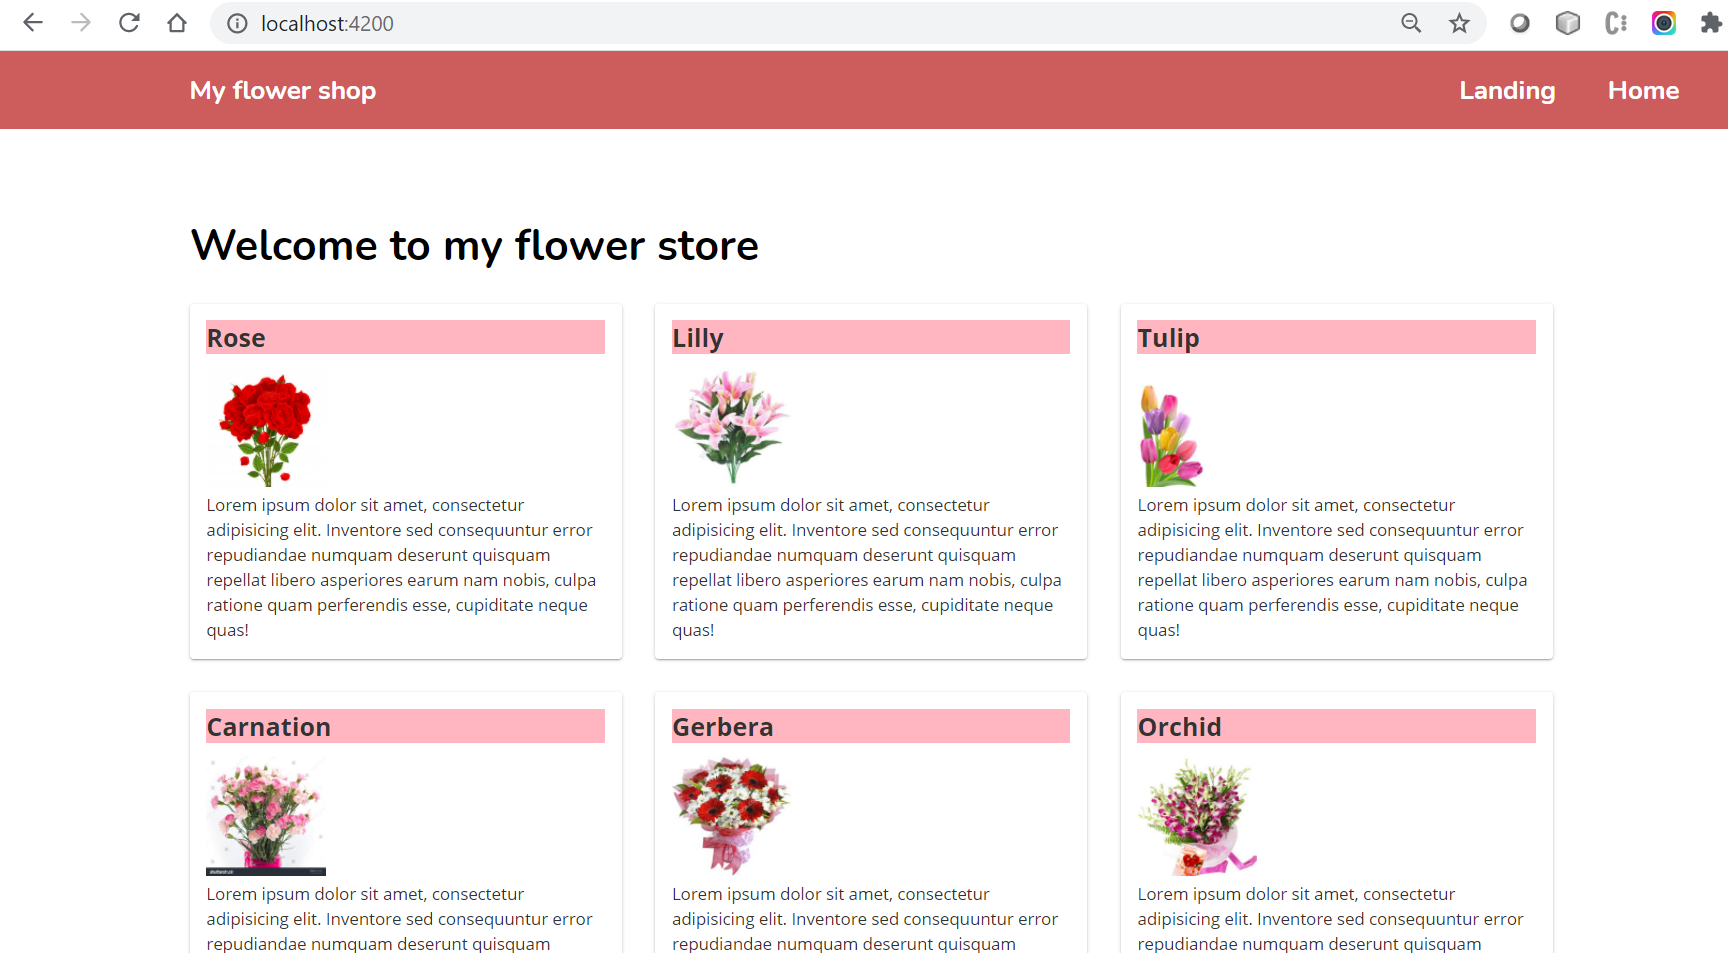
After applying all our changes flower store app will look like below. 


primeng flower store app complete example


Saturday, 12 December 2020

Getting Started With PrimeNG Styling in Angular App

December 12, 2020 0

primeng styling angular


This chapter I am going to explain how you can do the styling to our flower store app. There are different kind of CSS frameworks you can use to style you app.

Such as:

1.       Angular Material

2.       ngx-bootstrap

3.       NG bootstrap

4.       Prime NG


I am planning to use PrimeNG styling framework to style our flower store app.

PrimeNG has more than 80 UI component and it is a collection of rich UI components for Angular. All widgets are open source and free to use under MIT License.


How to Install Prime NG

1.   Run  

npm install primeng –save
 inside your root folder.


        npm_install_primeng


2.       Run

npm install primeicons –save
to install prime icons.


npm install primeicons


3.       Run

npm install font-awesome --save
to Install Font Awesome


npm install font-awesome --save


4.       Run

npm install @angular/cdk –save
to install angular  component dev kit.


npm install @angular/cdk –save


Now we are done with installing Prime NG to out flower store app. If you check your package json you will see below list of libraries.


PrimeNG installed libraries


Add below code to your angualr.json file style section.    


"styles": [

              "src/styles.scss",

              "./node_modules/primeicons/primeicons.css",

              "./node_modules/primeng/resources/themes/nova-light/theme.css",

             "./node_modules/primeng/resources/primeng.min.css"

            ],


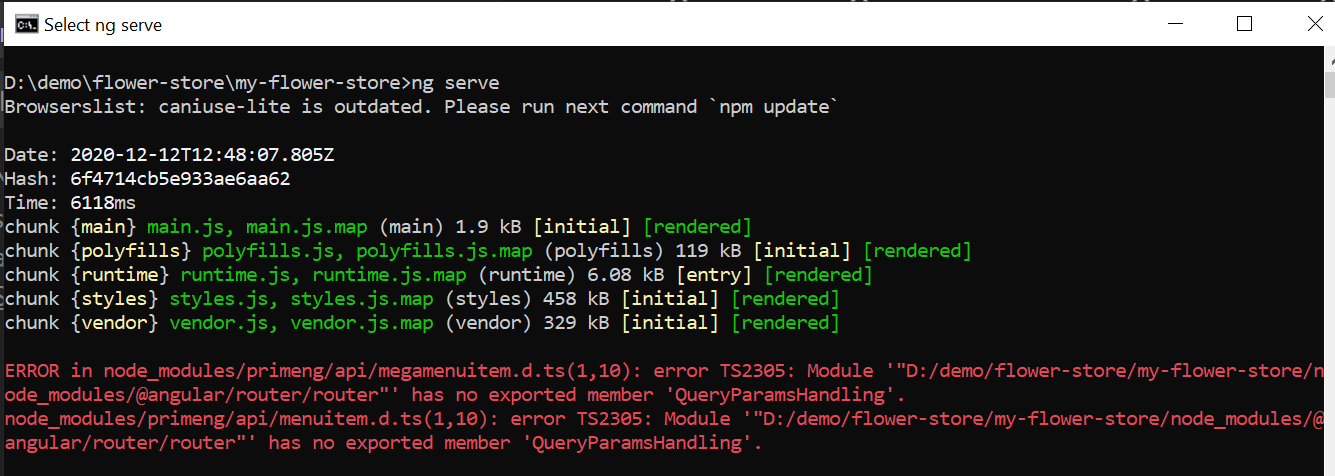
If you are using Angular 8 after above installation you will get error 

Broswerslist: caniuse-lite is outdated. Please run next command `npm update' 
node_modules/primeng/api/megamenuitem.d.ts(30,27): error TS2304: Cannot find name 'QueryParamsHandling'.
node_modules/primeng/api/menuitem.d.ts(1,10): error TS2305: Module '"../../@angular/router/router"' has no exported member 'QueryParamsHandling'.

     when you run ng serve command. 


ng serve error ng caniuse-lite is outdated. Please run next command


This is because there is a mismatch between the Angular version and the PrimeNG version. To resolve this, you can run below two commands to uninstall current version and install Angular 8 compatible PrimeNG version.

npm uninstall primeng

npm install primeng@8.0.1


Now you are ready to use PrimeNg to style your flower store app.


Thursday, 10 December 2020

How to add code snippet in Blogger

December 10, 2020 0


how to add code snippet in blogger

Blogger is very powerful and widely used blogging platform developed by Google Inc. You can create very attractive and user-friendly blogs using Blogger platform almost zero cost. Blogger can be easily connected with Google AdSense to monetize your blog. Due to simplicity and overall performance of the Blogger platform, many tech guys use this platform to create their technical blogs. If you want to add programming language code snippet into Blogger, many users face issues. Since you can’t simply copy and paste or type code snippets into edit post page. Not like normal text, code snippets should be well formatted and apply correct color combinations to have good look and feel to the readers. Different programming languages use different formats and different color combinations like this.


code snippet in blogger

In this post I will introduce easy method to add code snippet into your blog post while you are editing your post itself. There are two methods you can use; you can include your code snipper into your blog post and format accordingly or use external system to embed code snippet into your blog such as GitHub Gist. But add your code snippet into your post and manually format it not practical solution. So that, I will show you how to add code snippet into your blog post and automatically identify the language you have used in the code snippet and format accordingly.


Highlight.js (Syntax highlighting for the Web), is used to automatically highlight your code syntax and format accordingly. This library supports for 190 languages and 97 styles, automatic language detection, multi-language code highlighting, available for node.js, works with any markup and compatible with any JavaScript framework.


First you need your blog to link the library along with one of the styles and calling initHighlightingOnLoad method. There are several methods you can achieve this. But with Blogger I would suggest to use CDN Hosted method, since it is straight forward less complex. In this blog also I have used same method to show code snippets.


Go to Theme and CUSTOMISE.


theme and customize blogger

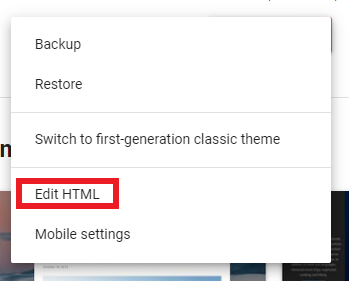
Go to Edit HTML.


edit html blogger theme


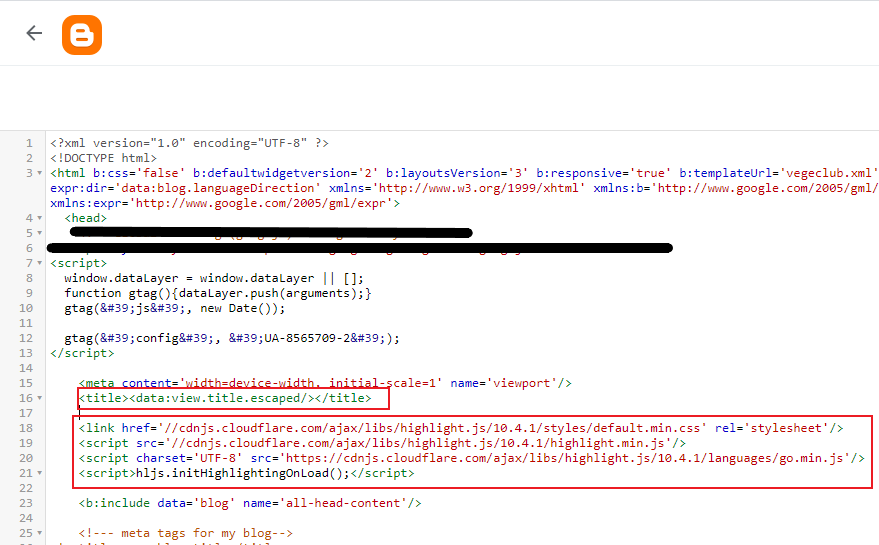
Find

<title><data:view.title.escaped/></title>
by pressing Ctrl + F and add CDN code just below this line.
<link rel="stylesheet"  href="//cdnjs.cloudflare.com/ajax/libs/highlight.js/10.4.1/styles/default.min.css"/>

<script src="//cdnjs.cloudflare.com/ajax/libs/highlight.js/10.4.1/highlight.min.js"></script>

<!-- and it's easy to individually load additional languages -->

<script charset="UTF-8"

 src="https://cdnjs.cloudflare.com/ajax/libs/highlight.js/10.4.1/languages/go.min.js"></script>

<script>hljs.initHighlightingOnLoad();</script>


add highlight.js to blogger theme


Save edited HTML code by clicking on Save button.


save blogger theme html

Now you have setup your Blogger platform to add code snippet. Then you can write your blog post and add code snippet.


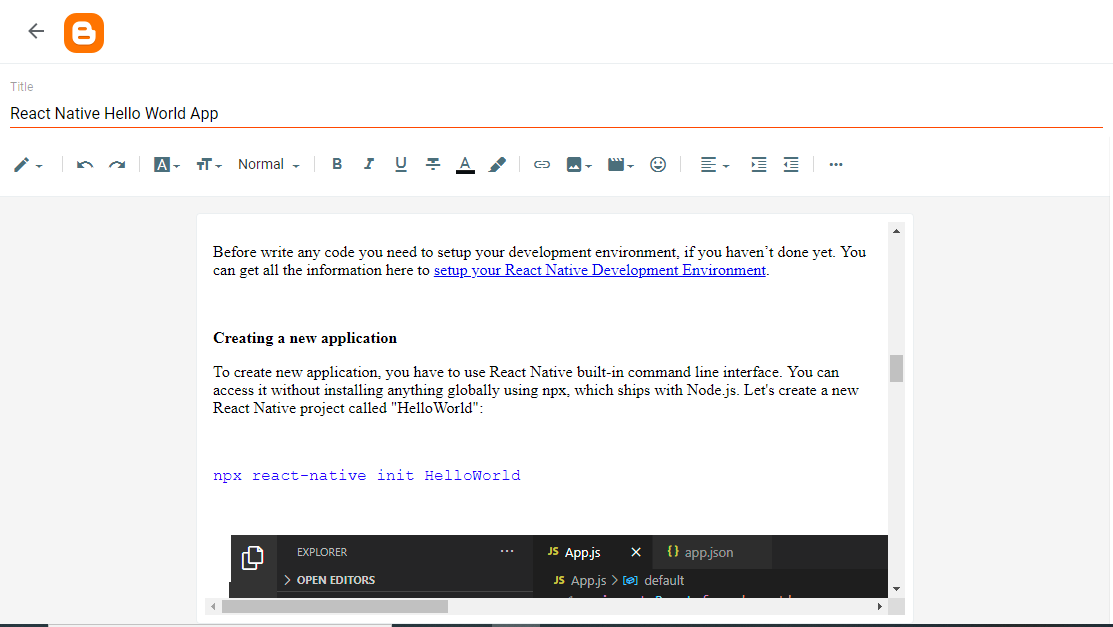
Go to add new post or edit post page of blogger.


blogger edit post page


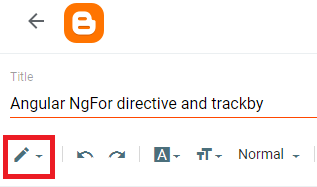
Go to HTML View.


go to html view


Click HTML View button.


click HTML View button

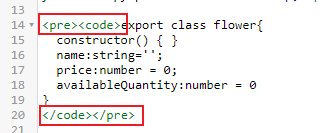
In HTML code you can code snippet to your blog post. To identify the code snippet part and automatically highlight the syntax you have to wrap your code snippet using


<pre><code> {code snippet} </code></pre>


tags.


pre code code snippet


Then Publish or Update your blog post.


You are done. Go to your blog post and see how your code snippet looks like.


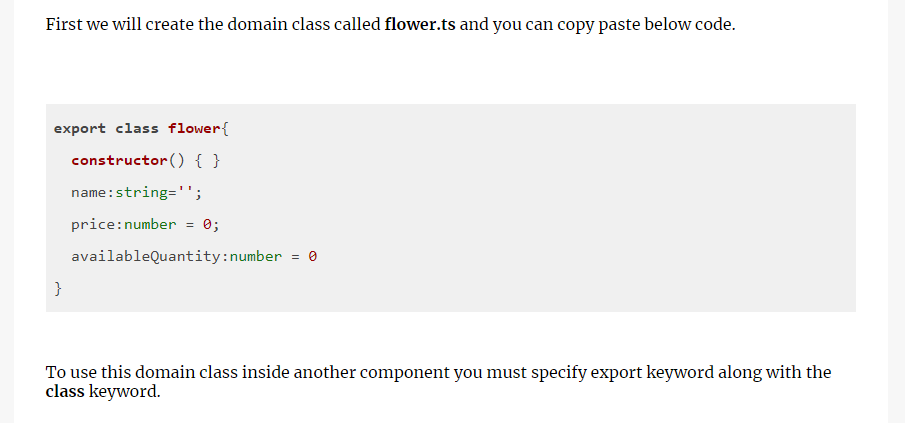
this is how your code snippet look like after highlight


Here system automatically detects the language and format accordingly. If automatic detection doesn’t work, you can specify the language in the class attribute.

<pre><code class="html">...</code></pre>


I think I explained everything and complete. However, if you find any difficulties you may specify under comments section and I will look into that.


Tuesday, 8 December 2020

Angular NgFor directive and trackby

December 08, 2020 0
angular ngfor trackby example


Today we will learn about NgFor one of the core directive of angular. NgFor helps to build list and tables in Angular


Let us see the example in our flower store app. In the landing page I am going to print list of flowers that are available in the store. Later we will add images and show them in a carousel to rotate automatically.


First we will create the domain class called flower.ts and you can copy paste below code. 


export class flower{
  constructor() { }
  name:string='';
  price:number = 0;
  availableQuantity:number = 0
}


To use this domain class inside another component you must specify export keyword along with the class keyword.

Flower domain has 3 attributes to store name of the flower then price and the available quantity.

Now we can create the array from the flower type as below inside the landing.component.ts file.


myFlowerList:flower[]=[];


I will call a method inside ngOnInit to add values to the array as below.

ngOnInit is one of the life cycle hooks used in angular and it executed only one time when component is initiating.


ngOnInit() {
    this.mySellingFlowers();
  }

  mySellingFlowers(){
    let rose = new flower();
    rose.name = "Rose";
    rose.price = 100;
    rose.availableQuantity = 1000;
    this. myFlowerList.push(rose);

    let lily = new flower();
    lily.name = "Lily";
    lily.price = 80;
    lily.availableQuantity = 2000;
    this. myFlowerList.push(lily);

    let tulip = new flower();
    tulip.name = "Tulip";
    tulip.price = 100;
    tulip.availableQuantity = 2300;
    this. myFlowerList.push(tulip);

    let carnation = new flower();
    carnation.name = "Carnation";
    carnation.price = 50;
    carnation.availableQuantity = 1500;
    this. myFlowerList.push(carnation);
  }


Now we have an array with different flowers. Let’s see how we can iterate the array using ngFor directive.

Copy paste below code in you landing.component.html file.


<ul>
    <li *ngFor="let flower of myFlowerList">
        {{flower.name}}
    </li>
</ul>


myFlowerList is the array that we defined and initiated in the landing.component.ts file.

*ngFor is helping to loop the array element and it will hold each element in flower object and you can access it properties with the . operator.

{{}} is called interpolation and it will print the value of the variable in your browser.

Now let’s check our browser. Here it is.


angular ngfor trackby example - flower store

Finding the index of a list element


Now let’s see how you can track the index of each element and use that index to generate unique id for each flower element.


<ul>

    <li *ngFor="let flower of myFlowerList;let i = index">

        <span id="flower_{{i}}">{{flower.name}}</span>

    </li>

</ul>
track the index of each element and use that index to generate unique id

How to use trackBy?

Track by function is using to improve performance. If you don’t use track by function whenever your array get change it will reload the whole DOM object but with track by function it will change only that element.


To use trackby function you can update landing.component.html file as below


<ul>
    <li *ngFor="let flower of  myFlowerList;trackBy:trackFlowers">
        <span >{{flower.name}}</span>
    </li>
</ul>


Then define the trackFlower function in landing.component.ts file as below.


trackFlowers(index,flower){
    return flower?flower.name:undefined
}

I hope you enjoyed the post. In next post we will apply some styles and background flower images to our flower list.


Sunday, 6 December 2020

How to draw a Circle using HTML and CSS?

December 06, 2020 0
How to draw a Circle using HTML and CSS?


It is very easy to draw shapes in HTML web page using CSS, for various applications. This is very common requirement for many UI developers to come up with elegant web pages to suit your client requirements. There are many ways to draw UI component on the HTML web page, there are different framework support different methods to draw. But you can easily draw Shapes on HTML web page using CSS and almost every web browser is capable of rendering without any issue. But if you use some frameworks to design your web UI, there might have some limitations specially for different browsers.


In this example I am going to draw a Circle on your webpage. There are two sections that you need to add to complete this task. First you need to add HTML component, where the object actually resides on the web page. Next is to change the look and feel of the HTML component to see like Circle. We call it as change the style. For that we need apply some style using CSS.

Here is the HTML page.


<html>

  <head>

  </head>

  <body>

    <div id="circle"></div>

  <body>

</html>


You have to define, HTML header and body parts. In the body part, we put a <DIV> to render our Circle shape.


<div id="circle"></div>

We give an ID called “circle” to our <DIV>. We can use this ID to refer our HTML component in CSS code to change the appearance of the component. If you have two HTML components you can give two different IDs and use them to refer in CSS code differently.

 Here is the CSS part.

 
<style>

      #circle {

            width: 50px;

            height: 50px;

            -webkit-border-radius: 25px;

            -moz-border-radius: 25px;

            border-radius: 25px;

            background: red;

          }

    </style>

Under header section of HTML page, you have to define your CSS style code.

<head></head>


#circle is referring to HTML DIV with ID “circle”, and apply above style to that component only. That is why we need to specify the DIV ID here.

Then we give height and width to 50 pixels, set border radius to 25 pixels and change background color of the circle to red. You can change these properties as you wish to change the look and feel of your circle.


Complete code:

 
<html>

  <head>

    <style>

      #circle {

            width: 50px;

            height: 50px;

            -webkit-border-radius: 25px;

            -moz-border-radius: 25px;

            border-radius: 25px;

            background: red;

          }

    </style>

  </head>

  <body>

    <div id="circle"></div>

  <body>

</html>

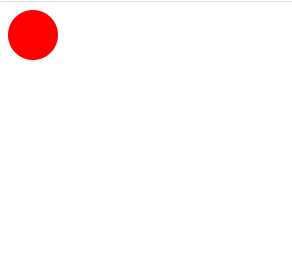
Above code generate, A HTML page with red circle.


A HTML page with red circle

Thursday, 3 December 2020

React Native Hello World App

December 03, 2020 0
Follow my blog with Bloglovin


Today we are going to develop our first React Native application. In this tutorial I am going to directly jump into coding without explain code much. You don’t need to know all sort of technical jargon to write your first React Native application.


This application just prints “Hello World” text on your phone screen. This application can run on Android or iOS device without any code change. This is the power of React Native. You can run your application both Android or iOS devices with minimum code change and most of the code common for both platforms.


Before write any code you need to setup your development environment, if you haven’t done yet. You can get all the information here to setup your React Native Development Environment.


Creating a new application

To create new application, you have to use React Native built-in command line interface. You can access it without installing anything globally using npx, which ships with Node.js. Let's create a new React Native project called "HelloWorld":


npx react-native init HelloWorld


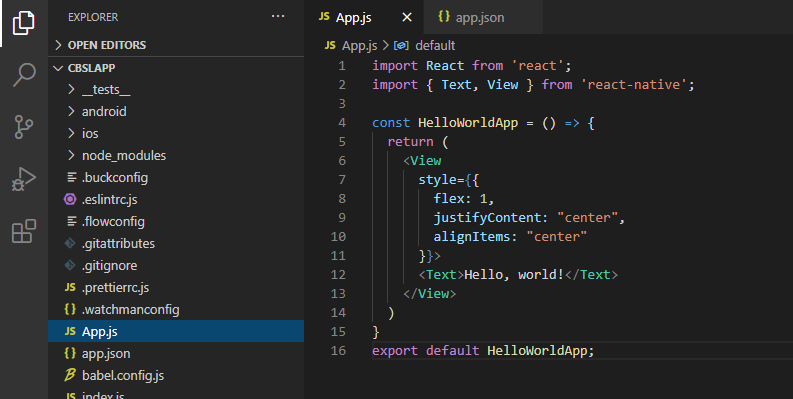
You need to modify App.js file as below to print “Hello World” on your phone screen.


import React from 'react';
import { TextView } from 'react-native';

const HelloWorldApp = () => {
  return (
    <View
      style={{
        flex: 1,
        justifyContent: "center",
        alignItems: "center"
      }}>
      <Text>Hello, world!</Text>
    </View>
  )
}
export default HelloWorldApp;


First two lines import "react" and "react-native" components. Then write simple function called "HelloWorldApp" and it just return "Hello, world!" text.


Finally, default export of "HelloWorldApp" function for rendering.


Next step is to run your application. Below command run your application either on your emulator or mobile device. If you want to test your application on the emulator you have to load your emulator. If you want to test your application on your phone you have to connect your phone via USB port to computer and run below command.

npx react-native start


This will load metro server.


Then run your application, run below command.


npx react-native run-android


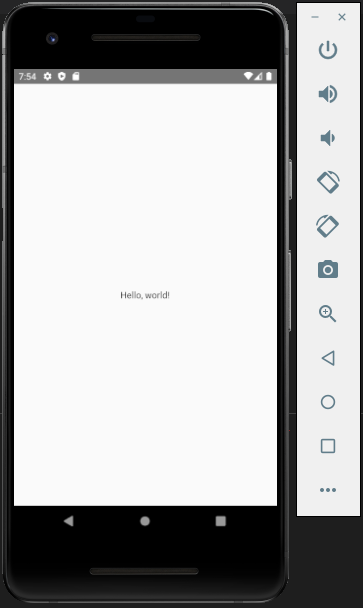
Now you can see your code is running like this.


Now modify your code and see how the changes are reflecting. This is very simple code, but good starting point. Next we try to develop some basic React Native Calculator application.


Tuesday, 1 December 2020

Dive deep into Spring Boot Architecture

December 01, 2020 0


Spring Boot is built on top of the Spring framework. Spring Boot helps you to build production grade application easily.

Spring Boot has a layered architecture. Which means each layer directly communicate with it below or upper layer.


Spring Boot layers


  • Presentation Layer

v  Presentation layer is having a responsibility of handling HTML requests and authenticate the requests. It also translates the JSON parameters to objects

  • Business Layer

v  Its handles all the business logics validation and authorization.

  • Persistence Layer

v  It contains all the storage logic like database queries and also helps to translate business object into database rows

  • Database Layer

v  The database layer consists of the database such as MySQL, PostgreSQL, MongoDB, etc. All the database related operations like CRUD (Create, Read/Retrieve, Update, and Delete) are performed in this layer.

Spring Boot layers
Spring Boot layers

Spring Boot Flow Architecture 

Spring Boot Flow Architecture


·         A client makes the https request (GET/POST/PUT)

·         Then it goes to controller maps it with appropriate method and call business logic if required

·         Business logic is performed in the service layer which might be performing the logic on the data from the database which is mapped through JPA with model/entity class


Search: spring boot deep dive,spring security architecture,how spring security works in spring boot,spring boot security and oauth2 in depth from scratch,spring boot security tutorial step by step,spring security amigoscode