Showing posts with label Angular CLI. Show all posts

Saturday, 23 January 2021

How to use Angular HttpClient and RxJS to consume REST API

January 23, 2021 0
Angular HttpClient and RxJS


Today I am going to discuss how you can interact with REST API services to load and manage data. 

Prerequisites

Before getting started, you need to have the below software installed on your development machine:

Node.js and npm. You can install both of them from the Node.js

Angular CLI  (You can install it from npm using: npm install -g @angular/cli)


Frontend applications needs to call backend services over http/https protocol to manage dynamic data. Best place to access data from backend APIs are service component. Once you defined your service class you can inject it in to component or another service to use the service methods. 

Angular Related Articles:

Angular provides the HttpClient service class in @angular/common/http module to interact with backend REST API services.

Using HttpClient request call you can easily handle your response and you can intercept your request and response. By intercepting the request, you can inject your security token or any other requested headers to all the service inside the one place. By intercepting the response, you can handle all the errors in a single place. I will explain interceptor concept in another chapter with more details. 

Today we will check how you can use HttpClient methods to do get data from service API. Get method of HTTP Client returns RxJS observable type and you can subscribe to the RxJS observable inside the component where you call the service method.

If you look at my flower store code in GitHub, you can see I have hard coded flower objects and put them into an array as below. 


  mySellingFlowers(){
    let rose = new flower();
    rose.name = "Rose";
    rose.price = 100;
    rose.availableQuantity = 1000;
    rose.isChecked = false;
    this. myFlowerList.push(rose);

    let lily = new flower();
    lily.name = "Lilly";
    lily.price = 80;
    lily.availableQuantity = 2000;
    lily.isChecked = false;
    this. myFlowerList.push(lily);

    let tulip = new flower();
    tulip.name = "Tulip";
    tulip.price = 100;
    tulip.availableQuantity = 2300;
    lily.isChecked = false;

    this. myFlowerList.push(tulip);

    let carnation = new flower();
    carnation.name = "Carnation";
    carnation.price = 50;
    carnation.availableQuantity = 1500;
    lily.isChecked = false;

    this. myFlowerList.push(carnation);

    let gerbera = new flower();
    gerbera.name = "Gerbera";
    gerbera.price = 50;
    gerbera.availableQuantity = 1500;
    lily.isChecked = false;

    this. myFlowerList.push(gerbera);

    let orchid = new flower();
    orchid.name = "Orchid";
    orchid.price = 50;
    orchid.availableQuantity = 1500;
    lily.isChecked = false;

    this. myFlowerList.push(orchid);

  }
  
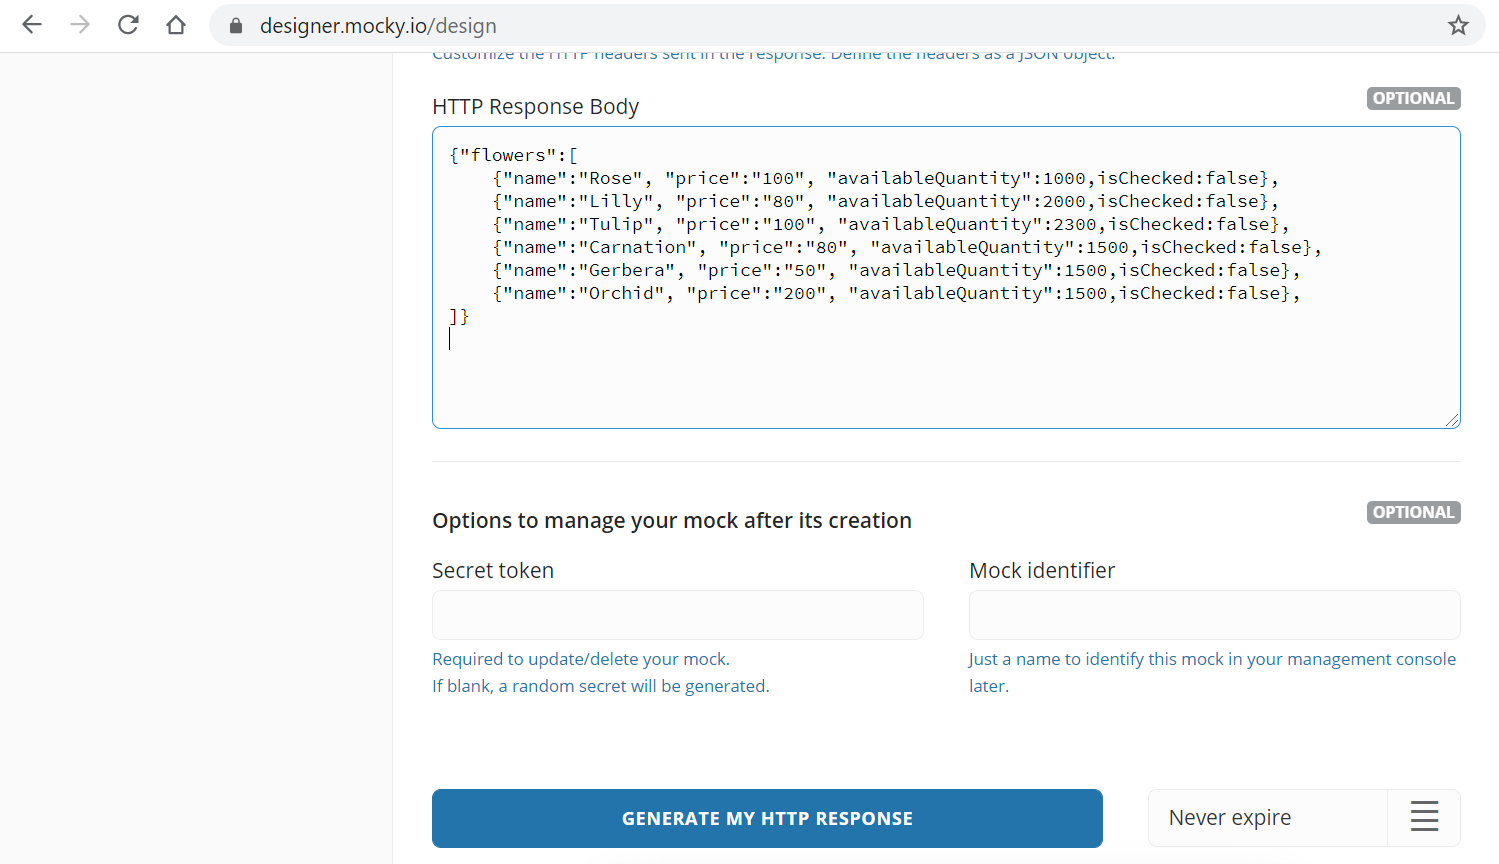
Today we will check how you can read flowers from backend REST API call. I am planning to use designer.mocky.io to mock my API call. To access list of flowers through API and to read it from Angular side that API should return an JOSN array. Therefor I will make a JSON array to define a response in my mock API as below.

{"flowers":[  
    {"name":"Rose", "price":"100", "availableQuantity":"1000","isChecked":false},    
    {"name":"Lilly", "price":"80", "availableQuantity":"2000","isChecked":false},  		
    {"name":"Tulip", "price":"100", "availableQuantity":"2300","isChecked":false},  	   
    {"name":"Carnation", "price":"80", "availableQuantity":"1500","isChecked":false}, 
    {"name":"Gerbera", "price":"50", "availableQuantity":"1500","isChecked":false},   
    {"name":"Orchid", "price":"200", "availableQuantity":"1500","isChecked":false}   
]
}
]}

https://designer.mocky.io/ to mock my API call

Click on the generate my http response button to get the access URL. In my case it is as below.

Click on the generate my http response button to get the access run.mocky.io/v3

Now let us see how you can access this URL and display data in html. As I said earlier best place to access the data layer is service class.

To generate the service, please run below CLI command in your command prompt. 

ng g s flower
ng g s flower command

Above command generate the default flower service as below.


import { Injectable } from '@angular/core';

@Injectable({
  providedIn: 'root'
})
export class FlowerService {

  constructor() { }
}

  
The @Injectable() decorator specifies that Angular can use this class with the Dependency Injection.

The metadata, providedIn: 'root', means that the FlowerService is visible throughout the application.
Now we will write a new method in a FlowerService class to access our API end point.

The HttpClient service in Angular 4.3+ is the successor to Angular 2's Http service. Instead of returning a Promise, its http.get() method returns an RxJS Observable object.

Therefore, to call our get API method I will import the HttpClient from Angualr/common/http and Observable module from RxJS. and then injected that to our service class as below.


import { Injectable } from '@angular/core';
import { HttpClient, HttpHeaders } from '@angular/common/http';
import { Observable } from 'rxjs';

@Injectable({
  providedIn: 'root'
})
export class FlowerService {

  constructor(private http:HttpClient) {}

    getFlowerList():Observable<any>{
      return this.http.get('https://run.mocky.io/v3/cee1c6e9-1491-4191-9054-ce7df1c1a500');
   }
}

  
getFlowerLIst() methods returns RxJS observable type and later in the landing component you can subscribe to access data.

To consume getFlowerList() method in our landing component we need to inject our service in to landing component through constructor and need to subscribe to the method.


constructor(private flowerService:FlowerService) { }
I have commented out my array with hard coded data and add the below codes to read data from service method.


this.flowerService.getFlowerList().subscribe(response=>{
      this.myFlowerList = response.flowers
    },
    err => console.error(err),
    () => console.log('done loading foods')
   )
I have added full code for landing component for you to refer. 


import { Component, EventEmitter, OnInit, Output, ViewEncapsulation } from '@angular/core';
import { flower } from '../../domain/flower';
import { DataService } from 'src/app/services/data.service';
import { FlowerService } from 'src/app/services/flower.service';

@Component({
  selector: 'app-landing',
  templateUrl: './landing.component.html',
  styleUrls: ['./landing.component.scss'],
 
})
export class LandingComponent implements OnInit {

  myFlowerList:flower[]=[];
  selectedFlowers: string[] =[];

  checkedList:string[]=[];
  searchText:string='';
  constructor(private dataService:DataService, private flowerService:FlowerService) { }

  ngOnInit() {
    this.mySellingFlowers();
    this.dataService.getSearchText().subscribe(response => {
      this.printSearchtext(response);
    })
  }

  printSearchtext(searchText){
    this.searchText = searchText;
  }

  printOrder(flowerName){
    if(this.selectedFlowers.indexOf(flowerName)<0){
      this.selectedFlowers.push(flowerName)
    }
    else{
      let index = this.selectedFlowers.indexOf(flowerName);
      this.selectedFlowers.splice(index,1);
    }

  }

  mySellingFlowers(){
    // let rose = new flower();
    // rose.name = "Rose";
    // rose.price = 100;
    // rose.availableQuantity = 1000;
    // rose.isChecked = false;
    // this. myFlowerList.push(rose);

    // let lily = new flower();
    // lily.name = "Lilly";
    // lily.price = 80;
    // lily.availableQuantity = 2000;
    // lily.isChecked = false;
    // this. myFlowerList.push(lily);

    // let tulip = new flower();
    // tulip.name = "Tulip";
    // tulip.price = 100;
    // tulip.availableQuantity = 2300;
    // lily.isChecked = false;

    // this. myFlowerList.push(tulip);

    // let carnation = new flower();
    // carnation.name = "Carnation";
    // carnation.price = 50;
    // carnation.availableQuantity = 1500;
    // lily.isChecked = false;

    // this. myFlowerList.push(carnation);

    // let gerbera = new flower();
    // gerbera.name = "Gerbera";
    // gerbera.price = 50;
    // gerbera.availableQuantity = 1500;
    // lily.isChecked = false;

    // this. myFlowerList.push(gerbera);

    // let orchid = new flower();
    // orchid.name = "Orchid";
    // orchid.price = 50;
    // orchid.availableQuantity = 1500;
    // lily.isChecked = false;

    // this. myFlowerList.push(orchid);

    this.flowerService.getFlowerList().subscribe(response=>{
      this.myFlowerList = response.flowers
    },
    err => console.error(err),
    () => console.log('done loading foods')
   )

  }

  trackFlowers(index,flower){
    return flower?flower.name:undefined
  }
}

  
The subscribe() method takes three arguments which are event handlers. They are called onNext, onError, and onCompleted. 

The onNext method will receive the HTTP response data

The onError event handler is called if the HTTP request returns an error code such as a 500. 

The onCompleted event handler executes after the Observable has finished returning all its data. 

myFlowerList array contains data return from the API call and using *ngFor you can iterate and display it in a HTML as below.


<div *ngFor="let flower of myFlowerList;trackBy:trackFlowers">
      <flower-card [title]="flower.name" (selectedFlower)="printOrder($event)"></flower-card>
</div>
To use the Angular HttpClient, we need to inject it into our app's dependencies in app.module.ts file as below.


imports: [
    BrowserModule,
    AppRoutingModule,
    CardModule,
    CheckboxModule,
    CommonModule,
    FormsModule,
    InputTextModule,
    HttpClientModule
    ],
Unless it gives you below error.

core.js:7187 ERROR Error: Uncaught (in promise): NullInjectorError: StaticInjectorError(AppModule)[HttpClient]: 
  StaticInjectorError(Platform: core)[HttpClient]: 
    NullInjectorError: No provider for HttpClient!
NullInjectorError: StaticInjectorError(AppModule)[HttpClient]:
I have added app.module.ts file code after adding the dependency and you can check full code to the app by accessing GitHub.


import { BrowserModule } from '@angular/platform-browser';
import { NgModule } from '@angular/core';

import { AppRoutingModule } from './app-routing.module';
import { AppComponent } from './app.component';
import { LandingComponent } from './modules/landing/landing.component';
import { HomeComponent } from './modules/home/home.component';
import { CardModule } from 'primeng/card';
import {CheckboxModule} from 'primeng/checkbox';
import { CommonModule } from '@angular/common';
import { FormsModule }    from '@angular/forms';
import {InputTextModule} from 'primeng/inputtext';
import { FlowerCardComponent } from './modules/cards/flower-card/flower-card.component';
import { HttpClientModule } from '@angular/common/http';

@NgModule({
  declarations: [
    AppComponent,
    LandingComponent,
    HomeComponent,
    FlowerCardComponent
  ],
  imports: [
    BrowserModule,
    AppRoutingModule,
    CardModule,
    CheckboxModule,
    CommonModule,
    FormsModule,
    InputTextModule,
    HttpClientModule
    
  ],
  providers: [],
  bootstrap: [AppComponent]
})
export class AppModule { }
Once you load the app it will show same data as before by getting the data from backend API call.

My Flower Store Angular App

Conclusion

In this tutorial, we used HttpClient and RxJS modules to retrieves data from a REST API using the get() method of HttpClient. First I have explained how you can generate service component using the CLI command. Then I have described how  to subscribe to the RxJS Observable returned by the get() method and how to use the *ngFor directive to iterate over fetched data in the template. 

Monday, 28 December 2020

Angular share data between parent child components using @Input and @Output decorators

December 28, 2020 0
Angular share data between parent child components


Last chapter we have discussed how we can share data between two unrelated components using behavioral subjects in Angular 8. Today I am going to explain how you can make an interaction between parent and child component using Angular.

Before moving forward, I will generate one component in my flower store angular app. Flower store is the app we used to demonstrate the angular concept talked in series of chapters in this blog. 

To generate the component, please run below ng CLI command in your command prompt. 

ng g c flower-card

Above command will generate the flower-card.component.ts and corresponding html and CSS files as below.


run cli command ng g c flower-card to generate the component in angular

Angular Related Articles:


In our flower app component landing page view has cards for each flower as below.

landing page of my flower store angular app


Currently your landing.component.html includes all the code to display cards. Below commented lines used to shows cards for each flower. 


<h1>Welcome to my flower store</h1>

    <div *ngFor="let flower of myFlowerList;trackBy:trackFlowers">
        <!-- <p-card header="{{flower.name}}"  [style]="{width: '360px','float':'left','margin-bottom': '2em','margin-right': '2em','background-color':'light-pink'}" styleClass="p-card-shadow">
                <img alt="Card" width="100" height="100" src="assets/stock/{{flower.name}}.jpg">
            <p>Lorem ipsum dolor sit amet, consectetur adipisicing elit. Inventore sed consequuntur error repudiandae numquam deserunt
                quisquam repellat libero asperiores earum nam nobis, culpa ratione quam perferendis esse, cupiditate neque quas!</p>
                <p-checkbox name="flower" [style]="{'margin-top': '2em'}" value="{{flower.name}}" label="Order Now" [(ngModel)]="selectedFlowers"></p-checkbox>
             
            </p-card> -->
    </div>

    <div>Your search text is: {{searchText}}</div>

    <ul>
        <li *ngFor="let selectedFlower of selectedFlowers">
            <input id="select-user" type="checkbox" (change)="onCheckboxChange(selectedFlower,$event)"> {{selectedFlower}}

        </li>
    </ul>


I am going to replace commented lines by adding selected tags of flower-card component and I am going to move card displaying logic in to flower-card.component.html.

<h1>Welcome to my flower store</h1>

    <div *ngFor="let flower of myFlowerList;trackBy:trackFlowers">
      <flower-card></flower-card>
    </div>

    <div>Your search text is: {{searchText}}</div>

    <ul>
        <li *ngFor="let selectedFlower of selectedFlowers">
            <input id="select-user" type="checkbox" (change)="onCheckboxChange(selectedFlower,$event)"> {{selectedFlower}}

        </li>
    </ul>

<flower-card> is a selector tag in the flower-card component file. Below is the flower-card.component.ts file code for you to understand.

import { Component, OnInit } from '@angular/core';

@Component({
  selector: 'flower-card', // selector 
  templateUrl: './flower-card.component.html',
  styleUrls: ['./flower-card.component.scss']
})
export class FlowerCardComponent implements OnInit {

  constructor() { }

  ngOnInit() {
  }
}


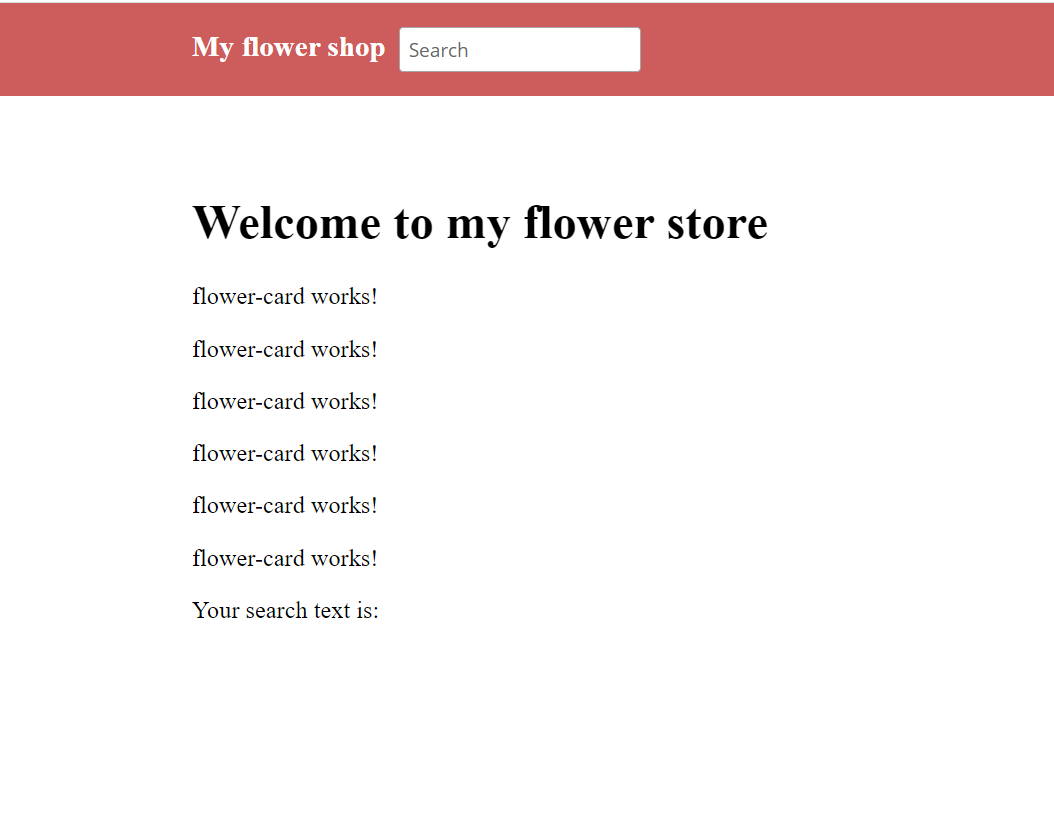
Now if I run my app you will see below screen because I still did not add any codes to flower-card.component.html file to shows flowers as a card.

flower-card.component.html file to shows flowers as a card

Pass data between parent component to child component in Angular

Now let’s focus on how to pass data from parent component (landing.component.ts) to child component (flower-card.component.ts). 

Now my flower array is defined inside the parent component and I am going to display data in child component. Now I must find a way to transfer data from parent to child component. 

In this case, we send the data from the parent component to the child component using an attribute. This attribute can then be accessed within the child component using the @input decorator.

Properties I need to pass from parent to child are only title or name of the flower since I used dummy text to display description.

I am using the title to read the image also. 

Now let us check how we can bind the attributes to child component from parent component below. There are two ways you can bind data.

<flower-card title="{{flower.name}}"></flower-card>

OR

<flower-card [title]="flower.name"></flower-card>

You can bind another attribute like description as below.

<flower-card [title]="flower.name" [description]="flower.description"></flower-card>

<h1>Welcome to my flower store</h1>

    <div *ngFor="let flower of myFlowerList;trackBy:trackFlowers">
      <!-- <flower-card title="{{flower.name}}"></flower-card> -->
      <flower-card [title]="flower.name"></flower-card>
   </div>

    <div>Your search text is: {{searchText}}</div>

    <ul>
        <li *ngFor="let selectedFlower of selectedFlowers">
            <input id="select-user" type="checkbox" (change)="onCheckboxChange(selectedFlower,$event)"> {{selectedFlower}}

        </li>
    </ul>


Now we have banded data from parent component to child component. Let us see how we can read these data from child component <flower-card-component>

To read data you should defined @Input() decorators. You need to import Input decorator from @angular/core to use @Input.

@Input() title:string =''

flower-card.component.ts file code.

import { Component, Input, OnInit } from '@angular/core';

@Component({
  selector: 'flower-card', // selector 
  templateUrl: './flower-card.component.html',
  styleUrls: ['./flower-card.component.scss']
})
export class FlowerCardComponent implements OnInit {

  constructor() { }
  
  @Input() title:string =''
  
  ngOnInit() {
  
  }
}}

Then I will copy paste commented code in parent component html (landing.component.html) file to child component html file and alter the file to display @input type variable value. (flower-card-component.html).

Since I am using PrimeNG component to display card and checkbox I will import PrimeNG modules in flower-card.component.ts file. Then I will move card style related code from landing.component.sccs to flower-card.component.scss file.

flower-card.component.html code:

<p-card header="{{title}}"  [style]="{width: '360px','float':'left','margin-bottom': '2em','margin-right': '2em','background-color':'light-pink'}" styleClass="p-card-shadow">
    <img alt="Card" width="100" height="100" src="assets/stock/{{title}}.jpg">
    <p>Lorem ipsum dolor sit amet, consectetur adipisicing elit. Inventore sed consequuntur error repudiandae numquam deserunt
        quisquam repellat libero asperiores earum nam nobis, culpa ratione quam perferendis esse, cupiditate neque quas!</p>
    <p-checkbox name="flower" [style]="{'margin-top': '2em'}" value="{{title}}" label="Order Now" [(ngModel)]="selectedFlowers"></p-checkbox>
</p-card>

flower-card.component.scss code:

.ui-card-title{
    background-color: lightpink !important;
}

.ui-chkbox-label{
    vertical-align:bottom;
}

Pass data between child component to parent component in Angular

In our previous application when user click on the checkboxes in each card checkbox value is bonded to the array using ngModel. So selected flower names will be stored in an array and you can directly print the value by iterating the array.

Now our checkbox is in child component and our printing logic is in parent component. So, you need to find a way to print the value when and checkbox checked event called in the child component.

To have child to parent communication we can capture the change in data due to any event within the child component. This event is then propagated to the parent component using the @Output decorator and Eventemitter.

First, I will define the object as below.

@Output() selectedFlower = new EventEmitter<string>();

To use @Output and EventEmitter you must import EventEmitter and Output component from @angular/core library.

In flower-card.component.html file I have added the check box change event. So, I can capture that event and emit it value to parent component as below. Since I used PrimeNG checkbox you must use (onChange) event.

<p-card header="{{title}}"  [style]="{width: '360px','float':'left','margin-bottom': '2em','margin-right': '2em','background-color':'light-pink'}" styleClass="p-card-shadow">
    <img alt="Card" width="100" height="100" src="assets/stock/{{title}}.jpg">
    <p>Lorem ipsum dolor sit amet, consectetur adipisicing elit. Inventore sed consequuntur error repudiandae numquam deserunt
        quisquam repellat libero asperiores earum nam nobis, culpa ratione quam perferendis esse, cupiditate neque quas!</p>
    <p-checkbox name="flower" [style]="{'margin-top': '2em'}" value="{{title}}" label="Order Now" (onChange)="selectCheckBox($event,title)" [(ngModel)]="selectedFlowers"></p-checkbox>
</p-card>

Then I am going to define the selectCheckBox event in flower-card.component.ts to emit the selected value.

selectCheckBox(value,name){
    this.selectedFlower.emit(name);
  }

import { Component, EventEmitter, Input, OnInit, Output, ViewEncapsulation } from '@angular/core';
import {CardModule} from 'primeng/card';
import {CheckboxModule} from 'primeng/checkbox';

@Component({
  selector: 'flower-card', // selector 
  templateUrl: './flower-card.component.html',
  styleUrls: ['./flower-card.component.scss'],
  encapsulation: ViewEncapsulation.None
})
export class FlowerCardComponent implements OnInit {

  constructor() { }

  @Input() title:string =''
  selectedFlowers: string[] = [];
  @Output() selectedFlower = new EventEmitter<string>();

  
  ngOnInit() {
  
  }

  selectCheckBox(value,name){
    this.selectedFlower.emit(name);
  }
}

Now we have implemented the code in child component. Let’s see how you can capture this emitted value and print it in a parent component.

For that you must bind the emitted event in a child component selected tag as below.

<flower-card [title]="flower.name" (selectedFlower)="printOrder($event)"></flower-card>

Here the bind event name should be same as the @Output name we defined in child component.
So now whenever user click on child component checkboxes that event is emitted to the parent component and printOrder() method defined in parent component will be executed. $event argument will contain the emitted value.

Inside the printOrder() method I have implemented the logic to check values is exist, if exist value will be remove from the array and if not value will be added to the array.

printOrder(flowerName){
    if(this.selectedFlowers.indexOf(flowerName)<0){
      this.selectedFlowers.push(flowerName)
    }
    else{
      let index = this.selectedFlowers.indexOf(flowerName);
      this.selectedFlowers.splice(index,1);
    }
}

Parent component code:

<h1>Welcome to my flower store</h1>

    <div *ngFor="let flower of myFlowerList;trackBy:trackFlowers">
      <flower-card [title]="flower.name" (selectedFlower)="printOrder($event)"></flower-card>
       </div>

    <div>Your have selected: {{searchText}}</div>

    <ul>
        <li *ngFor="let selectedFlower of selectedFlowers">
             {{selectedFlower}}

        </li>
    </ul>


import { Component, EventEmitter, OnInit, Output, ViewEncapsulation } from '@angular/core';
import { flower } from '../../domain/flower';
import { DataService } from 'src/app/services/data.service';

@Component({
  selector: 'app-landing',
  templateUrl: './landing.component.html',
  styleUrls: ['./landing.component.scss'],
 
})
export class LandingComponent implements OnInit {

  myFlowerList:flower[]=[];
  selectedFlowers: string[] =[];

  checkedList:string[]=[];
  searchText:string='';
  constructor(private dataService:DataService) { }

  ngOnInit() {
    this.mySellingFlowers();
    this.dataService.getSearchText().subscribe(response => {
      this.printSearchtext(response);
    })
  }

  printSearchtext(searchText){
    this.searchText = searchText;
  }

  printOrder(flowerName){
    if(this.selectedFlowers.indexOf(flowerName)<0){
      this.selectedFlowers.push(flowerName)
    }
    else{
      let index = this.selectedFlowers.indexOf(flowerName);
      this.selectedFlowers.splice(index,1);
    }

  }

  mySellingFlowers(){
    let rose = new flower();
    rose.name = "Rose";
    rose.price = 100;
    rose.availableQuantity = 1000;
    rose.isChecked = false;
    this. myFlowerList.push(rose);

    let lily = new flower();
    lily.name = "Lilly";
    lily.price = 80;
    lily.availableQuantity = 2000;
    lily.isChecked = false;
    this. myFlowerList.push(lily);

    let tulip = new flower();
    tulip.name = "Tulip";
    tulip.price = 100;
    tulip.availableQuantity = 2300;
    lily.isChecked = false;

    this. myFlowerList.push(tulip);

    let carnation = new flower();
    carnation.name = "Carnation";
    carnation.price = 50;
    carnation.availableQuantity = 1500;
    lily.isChecked = false;

    this. myFlowerList.push(carnation);

    let gerbera = new flower();
    gerbera.name = "Gerbera";
    gerbera.price = 50;
    gerbera.availableQuantity = 1500;
    lily.isChecked = false;

    this. myFlowerList.push(gerbera);

    let orchid = new flower();
    orchid.name = "Orchid";
    orchid.price = 50;
    orchid.availableQuantity = 1500;
    lily.isChecked = false;

    this. myFlowerList.push(orchid);

  }

  trackFlowers(index,flower){
    return flower?flower.name:undefined
  }
}

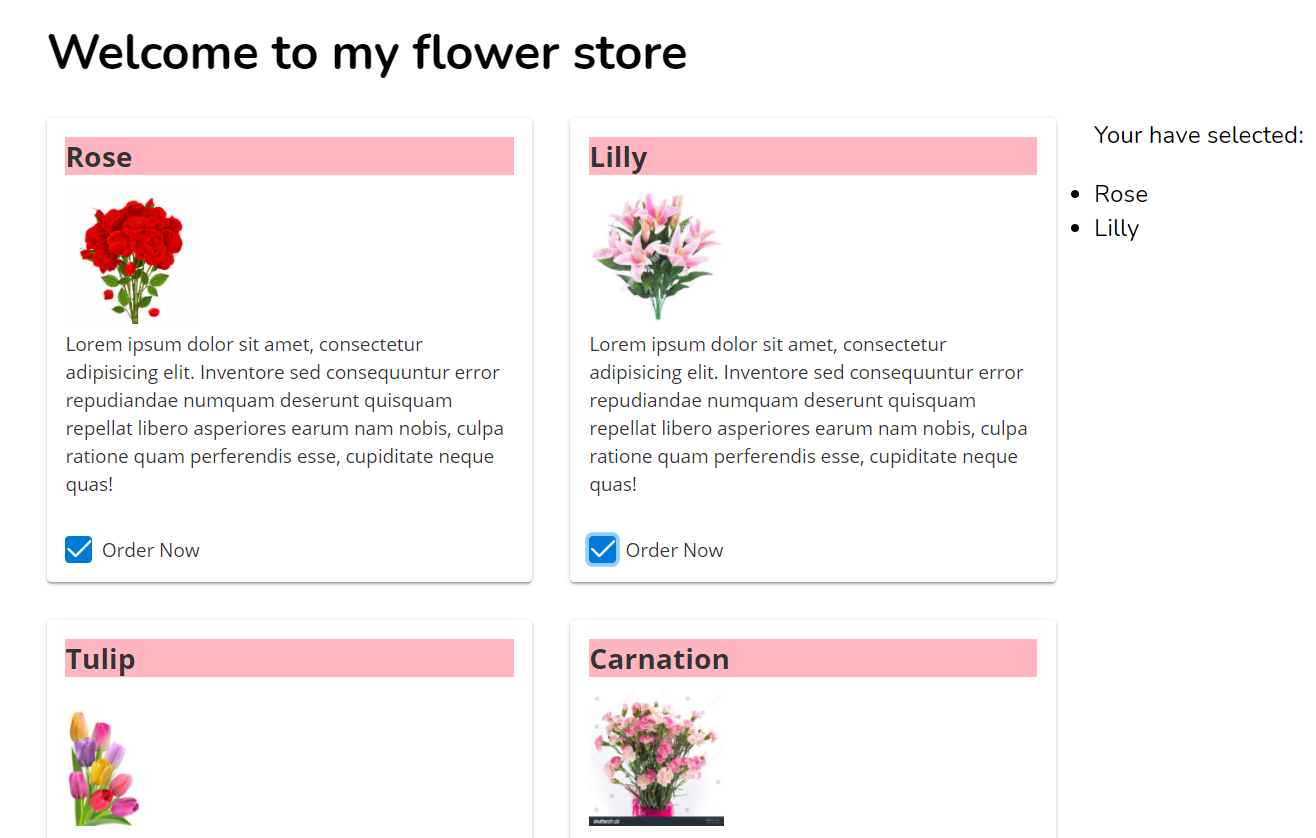
Now see the magic in your browser by clicking on the checkboxes.

click on checkboxes to select items in store


You can find complete source code related to the angular implementation we have done so far here in GitHub.


Sunday, 22 November 2020

Create Your First Angular Application - My Flower Store

November 22, 2020 0


Last tutorial you have learned how to set up your environment to work with Angular. In this tutorial you will learn how create your first Angular application.

Steps to create the Angular Project

Open command prompt Run 

ng new <<your app name>>

Once you run the above command it will ask you to select the type of css that you need to use.

Then Angular CLI will install necessary npm packages and other dependencies.

ng new my-flower-store command


Within a minute or two CLI will create the project with all the necessary features that you can run your app.

Initial app contains

  • A new workspace, with a root folder named my-flower-store (project name you gave with ng new command)
  • An initial skeleton app project, also called my-flower-store
  • An end-to-end test project (in the e2e subfolder).
  • Related configuration files.

Saturday, 21 November 2020

Introduction to Angular

November 21, 2020 0
Introduction to Angular


Google release AngularJS in year 2010. It got popular immediately because it made static HTML interactive. However, with other latest web development technologies developers started to see drawbacks of AngularJS.

Google then start to rewrite framework again and decided to shift from Java Script to Type Script. Type Script is helpful to avoid drawback of AngularJS

Angular 2 was then introduced in 2016 and it evolves up to Angular 9.


How to install Angular


To setting up the angular framework you need 

1. Node

To install node go to official site of node to download the version you need (nodejs)

Run the downloaded Node.js .msi Installer 

If you want to know the node version installed in your computer run following command

 node -v


node -v