Wednesday, 1 February 2023

Angular Standalone Components Routing

February 01, 2023 0

Angular Standalone Components Routing


Exploring the Benefits of Angular Standalone Components Routing

Angular Standalone Components Routing is a powerful feature of Angular that allows developers to create components that can be used independently of the main application. This means that developers can create components that can be used in multiple applications, allowing for more efficient development and reuse of code. The main benefit of Angular Standalone Components Routing is that it allows developers to create components that are completely independent of the main application. This means that developers can create components that can be used in multiple applications without having to worry about the main application's codebase. This makes it easier to maintain components and makes it easier to update them when needed. Another benefit of Angular Standalone Components Routing is that it allows developers to create components that are more modular and reusable. This means that developers can create components that can be used in multiple applications without having to rewrite the code for each application. This makes it easier to maintain components and makes it easier to update them when needed. Finally, Angular Standalone Components Routing allows developers to create components that are more secure. This means that developers can create components that are more secure than components that are part of the main application. This makes it easier to protect components from malicious attacks and makes it easier to update them when needed.

Understanding the Basics of Angular Standalone Components Routing

Angular Standalone Components Routing enables developers to create a single page application (SPA) that can be navigated through different components. This allows developers to create a more user-friendly experience for their users. Routing in Angular is done through the use of the RouterModule. This module is responsible for managing the routes in the application. It is responsible for creating the routes, mapping them to components, and handling the navigation between them. The RouterModule also contains the RouterLink directive which allows developers to link between different components. When creating a route, developers will need to specify the path, the component that should be loaded, and any additional parameters that should be passed to the component. The RouterModule also allows developers to specify guards and resolvers which can be used to control access to certain routes or to pre-fetch data before a component is loaded. Routing in Angular Standalone Components is a powerful feature that allows developers to create a more user-friendly experience for their users. It is important to understand the basics of routing in order to create a successful application.

// app.module.ts

import { NgModule } from '@angular/core';

import { Routes, RouterModule } from '@angular/router';

import { HomeComponent } from './home/home.component';

import { AboutComponent } from './about/about.component';


const routes: Routes = [

  { path: '', component: HomeComponent },

  { path: 'about', component: AboutComponent }

];


@NgModule({

  imports: [RouterModule.forRoot(routes)],

  exports: [RouterModule]

})

export class AppRoutingModule { }


 // home.component.ts

  import { Component, OnInit } from '@angular/core';


 @Component({

   selector: 'app-home',

   templateUrl: './home.component.html',

   styleUrls: ['./home.component.css']

 })


 export class HomeComponent implements OnInit {

    constructor() { }

    ngOnInit() {}

  }


 // about.component.ts

  import { Component, OnInit } from '@angular/core';


 @Component({

   selector: 'app-about',

   templateUrl: './about.component.html',

   styleUrls: ['./about.component.css']    })


 export class AboutComponent implements OnInit {

    constructor() {}

    ngOnInit() {}

  }

The code above is an example of routing in Angular. The AppRoutingModule imports the RouterModule and defines two routes, one for the HomeComponent and one for the AboutComponent. The HomeComponent and AboutComponent are both imported from their respective files and each contain a selector, templateUrl, styleUrls, constructor, and ngOnInit method. The router will use the paths defined in the AppRoutingModule to determine which component should be loaded when a user navigates to that path.

Creating Reusable Components with Angular Standalone Components Routing

Angular Standalone Components routing allows developers to quickly create components that can be used in multiple applications. This makes it easier to maintain and update components, as well as making them more reusable. The first step in creating reusable components with Angular Standalone Components routing is to create a new component. This can be done by creating a new folder in the project directory and adding an index.js file. This file will contain the code for the component. The next step is to create a route for the component. This is done by adding a route to the index.js file. The route should specify the path for the component, as well as any parameters that need to be passed to the component. Once the route is created, the component can be used in any application. To do this, the component needs to be imported into the application. This is done by adding the components path to the applications routes. Finally, the component can be used in the application. This is done by adding the components path to the applications template. The template should include the components path and any parameters that need to be passed to the component. By using Angular Standalone Components routing, developers can quickly create reusable components that can be used in multiple applications. This makes it easier to maintain and update components, as well as making them more reusable.

Optimizing Performance with Angular Standalone Components Routing

Angular Standalone Components Routing is a powerful tool for optimizing performance in Angular applications. It allows developers to create components that can be used in multiple places throughout the application, reducing the amount of code that needs to be written and maintained. By using components, developers can also reduce the number of requests made to the server, which can improve overall performance. Additionally, components allow developers to easily reuse code and create more efficient routing solutions.

Troubleshooting Common Issues with Angular Standalone Components Routing

·         Route is not being recognized:

Check that the route is defined in the app's routing module and that it is spelled correctly. Check that the path in the routerLink directive matches the route definition.

·         Component is not loading:

Check that the component is imported into the app's module and declared in its declarations array. Check that the component selector is being used in the template of another component.

·         RouterLink doesn't work:

Check that you are using an absolute path for your routerLink, such as '/home' instead of 'home'. Check that you are using a valid route path in your routerLink directive.

Best Practices for Implementing Angular Standalone Components Routing

  1. Use the Angular Router Module: The Angular Router module is an essential part of implementing standalone components routing. It provides the necessary tools for setting up routes, navigating between them, and managing navigation state.
  2. Use the Component Router Directive: The Component Router directive is a powerful tool for creating routes that are specific to a particular component. It allows you to specify which component should be rendered when a route is activated, as well as any parameters that should be passed to it.
  3. Define Routes in the App Module: When defining routes, it’s important to define them in the app module rather than inside individual components. This helps keep your code organized and makes it easier to maintain and debug.
  4. Use Route Guards: Route guards are useful for preventing unauthorized access to certain routes or components. They can also be used to check if a user is logged in before allowing them access to certain pages or features of your application.
  5. Use Resolvers: Resolvers are useful for pre-fetching data before a route is activated or rendered. This can help improve performance by ensuring that data is available when needed, instead of having to make additional requests after the route has been activated.

Integrating Angular Standalone Components Routing with Other Frameworks

Integrating Angular standalone components routing with other frameworks is possible by using a library such as ngRoute or ui-router. These libraries provide the necessary functionality to enable routing between components and other frameworks. For example, ngRoute can be used to map routes in an Angular application to routes in a Rails application, allowing for seamless navigation between the two. Similarly, ui-router can be used to map routes in an Angular application to routes in an Ember application. In both cases, the library provides the necessary hooks and APIs to enable routing between the two frameworks.

// Angular Component

import { Component } from '@angular/core';

import { Router } from '@angular/router';


@Component({

  selector: 'my-app',

  template: `<h1>My App</h1>

             <a (click)="goToPage()">Go to Page</a>`})

export class AppComponent {

  constructor(private router: Router) {}


  goToPage() {

    this.router.navigate(['/page']); // navigate to page route in angular component

  } 

}


// Other Framework Code Example (e.g. React)

import React, { useEffect } from 'react';

import { useHistory } from 'react-router-dom'; // import react router dom hook for routing 


 const App = () => {

   const history = useHistory(); // get the history object to use for routing

   useEffect(() => { // call this function on mount of component

     window.addEventListener('goToPage', () => { // listen for the goToPage event dispatched by angular component

       history.push('/page'); // push the page route to react router dom history object 

     });

   }, []);

   return ( <h1>My App</h1> ); // render app component with no link as it is handled by angular component now  

 };


Above code is an example of how to integrate Angular and React components together. The Angular component has a link that when clicked, it will navigate to the page route using the Router service. The React component is listening for an event dispatched by the Angular component when the link is clicked, and then uses the useHistory hook to push the page route to the React Router Dom history object.

Leveraging Angular Standalone Components Routing for Mobile Development

Angular Standalone Components Routing is a powerful routing system for mobile development that enables developers to create and manage routes for their applications. This system allows developers to easily define and manage routes, as well as create custom routes for specific components. It also provides a way to handle navigation between components, making it easier to develop complex applications with multiple views and components. With Angular Standalone Components Routing, developers can quickly and easily create powerful mobile applications that are optimized for performance and user experience.


// App.js

import React from 'react';

import { BrowserRouter as Router, Route } from 'react-router-dom';

import Home from './Home';

import About from './About';

import Contact from './Contact';


function App() {

  return (

    <Router>

     <Route exact path="/" component={Home} />

     <Route exact path="/about" component={About} />

     <Route exact path="/contact" component={Contact} />

    </Router>

  );

}

export default App;

// Home.js - Component for the home page of the app. This is where you would add your Angular standalone components.

import React, { Component } from 'react';  // import React and Component class from react library

 class Home extends Component {   // create a class called Home that extends the Component class

   render() {   // define a render method to return JSX elements to be rendered on the page

     return (    // return JSX elements to be rendered on the page

       <div>     // create a div element to contain all other elements

         <h1>Welcome to my App!</h1>   // create an h1 element with text content Welcome to my App!

        <AngularStandaloneComponent />   // add an Angular standalone component here

       </div>    // close the div element

     );   // close the return statement

   }   // close the render method

 }   // close the Home class definition


export default Home;   // export the Home class so it can be imported in other files

Securing Your Application with Angular Standalone Components Routing

Angular Standalone Components Routing is a powerful tool for securing your application. It allows you to define routes that can be used to protect certain sections of your application and also allows you to restrict access to certain parts of the application based on user roles. This helps ensure that only authorized users can access certain areas of the application. Additionally, it provides an easy way to manage authentication and authorization for different parts of the application.

import { NgModule } from '@angular/core';

import { RouterModule, Routes } from '@angular/router';

import { HomeComponent } from './home.component';

import { LoginComponent } from './login.component';

import { RegisterComponent } from './register.component';

import { AdminComponent } from './admin.component';


const routes: Routes = [

  { path: '', component: HomeComponent },

  { path: 'login', component: LoginComponent },

  { path: 'register', component: RegisterComponent },

  { path: 'admin', component: AdminComponent, canActivate:[AdminGuard] } // only allow access to admin if user is authenticated and has admin role

];


@NgModule({

  imports: [ RouterModule.forRoot(routes) ],   // configure the router with routes and use hash location strategy (default) 

  exports: [ RouterModule ]                    // export RouterModule to import in the AppRoutingModule in the root module (app.module.ts) 

}) 

export class AppRoutingModule {}


Above code is setting up routing for an Angular application. The routes variable defines the different paths that can be used in the application and what component should be loaded when a user navigates to that path. The @NgModule decorator is used to configure the router with the routes and use hash location strategy (default). The RouterModule is then exported so it can be imported in the AppRoutingModule in the root module (app.module.ts).

Building Scalable Applications with Angular Standalone Components Routing

Angular Standalone Components Routing allows developers to create components that can be used in different parts of the application, and it also enables them to easily switch between different routes. This makes it easier to maintain and update the application, as well as making it easier for users to navigate through the application. The main advantage of Angular Standalone Components Routing is that it allows developers to define routes within each component, rather than having to define all routes in one place. This makes it easier to manage and maintain the application as changes can be made without having to modify the entire application. Additionally, this approach allows developers to create reusable components that can be used in multiple parts of the application. Another benefit of Angular Standalone Components Routing is that it provides an easy way for developers to add custom logic and features into their components. For example, they can easily add authentication or authorization logic into their components, as well as customizing how data is displayed within each component. This makes it easier for developers to customize their applications and make them more user-friendly. Finally, Angular Standalone Components Routing also provides a way for developers to easily test their components before deploying them into production environments. This helps ensure that the components are working correctly and are ready for use in production environments.

import { NgModule } from '@angular/core';

import { Routes, RouterModule } from '@angular/router';

import { HomeComponent } from './home/home.component';

import { AboutComponent } from './about/about.component';

import { ContactComponent } from './contact/contact.component';


const routes: Routes = [

  { path: '', component: HomeComponent },

  { path: 'about', component: AboutComponent },

  { path: 'contact', component: ContactComponent },

];


@NgModule({

imports: [RouterModule.forRoot(routes)],

 exports: [RouterModule]

})

export class AppRoutingModule {}

Above code is setting up routing for an Angular application. The "routes" array contains objects that define the path and the component to be used when the path is accessed. The "@NgModule" decorator is used to create a module, which in this case is the AppRoutingModule. This module imports the RouterModule and sets up routing using the routes array. It then exports the RouterModule so it can be used in other parts of the application.


Sunday, 7 March 2021

Angular Pipes

March 07, 2021 0
angular pipes "|"

This article covers following topics in details:

  • Purpose of having pipes in Angular.
  • Built in Pipes and its usage.
  • How to create custom Pipes

Purpose of having pipes in Angular.

Pipes are used to format your data based on the requirement. Pipes donate from symbol “|” and you can use it inside the HTML template where you display the data with interpolation.

Example if you want to format amount bases on some currency type you can use below expression.

{{ amount | currency:'EUR' }}

Pipes is simply a function which accept an input values such as integers, strings, arrays, and date and returns the transform value and display the same in the browser.

Built in Pipes and its usage.

There are several built in pipes in Angular.

  1. Uppercase pipe
  2. Lowercase pipe
  3. Date pipe
  4. Currency pipe
  5. Percent pipe
  6. Decimal pipe
  7. Slice pipe

After setting up the environment and creating the example app we will try out each default pipe provided by Angular framework.


Setting up the environment. 


I will create a new project AngularPipes. After setting up your environment please run the below command in your command prompt.

ng new angular-pipes

This will create the new project with all the necessary default libraries and files.

Now go inside the angular-pipe folder and run ng serve to up and run your application with default settings. Type http://localhost:4200/ in your browser to see the app is running.

Go to app.component.ts and type below codes. Here I have defined set of variables and assigned values to use in template file to show the usage of pipes.

import { Component } from '@angular/core';

@Component({
  selector: 'app-root',
  templateUrl: './app.component.html',
  styleUrls: ['./app.component.scss']
})
export class AppComponent {
  title = 'angular-pipes';
  todayNumber: number = Date.now();
  todayDate : Date = new Date();
  todayString : string = new Date().toDateString();
  todayISOString : string = new Date().toISOString();
  amount = 1000;
  floatValues = 2.5;
  number1 = 13.456789;
  week=["Sunday","Monday","Tuesday","Wednesday","Thursday","Friday","Saturday"];
  arrayToTranform = [1000,1500,5000];
}
Now let us see how we can use each default pipes. Type below codes in app.component.html file and see the output in a browser.

1. Uppercase Pipe
<h1>UPPERCASE</h1>
  <h2>
   Welcome to {{ title|uppercase }}
 </h2>
angular uppercase pipe example
2. Lowercase Pipe
<h1>LOWERCASE</h1>
  <h2>
    Welcome to {{ title|lowercase }}
 </h2>


angular lowercase pipe example
3. Date pipe

Below example will show you how you can use default date pipe for different formats of date values and its output.

<h1>datepipe for milisecond value: {{todayNumber}}</h1>
  <h2>
    {{todayNumber | date}}
  </h2>

  <h1>datepipe for date Object: {{todayDate}}</h1>
  <h2>
    {{todayDate | date}}
  </h2>

  <h1>datepipe for date String: {{todayString}}</h1>
  <h2>
    {{todayString | date}}
  </h2>
  
  <h1>datepipe for ISO date String: {{todayISOString}}</h1>
  <h2>
    {{todayISOString | date}}
  </h2>
angular date pipe example

All types of datetime values displays the date in ‘MMM d, yyyy’ format which is default Angular date format ‘mediumDate

To change the datetime format in angular we must pass date time format parameter to the angular pipe.
There are 12 predefined date types in Angular. We must pass first parameter “format” as quoted string with the predefined date format names listed below.

Example: 

{{todayDate | date :'short'}}

Below are the 12 formats that you can pass along with the date pipe to show date values in various ways.

short
medium
long
full
shortDate
mediumDate
longDate
fullDate
shortTime
mediumTime
longTime
fullTime

4. Currency pipe

Below example will show how you can use angular currency pipe based on locale. If you do not pass the locale default value taken as USD.

<h1>Amount {{amount}} in USD format</h1>
   <h2>
     {{amount | currency}}
   </h2>

<h1>Amount {{amount}} in Japanese yen format</h1>

   <h2>
    {{ amount | currency:'JPY' }}
   </h2>
angular currency pipe example
5. Percent pipe

Percent pipe is used to format the number based on the percentage. As an example, let us see how below code is working.

<h1>Amount {{floatValues}} as a percentage</h1>
      <h2>
        {{floatValues | percent}}
       </h2>

    <h1>Amount {{floatValues}} as a percentage</h1>
      <h2>
        {{floatValues | percent:'2.2-5'}}
      </h2>
{{floatValues | percent:'2.2-5'}}

Above syntax means you are going to represent number in a format as below.
minIntegerDigits = 2
minFractionDigits = 2
maxFractionDigits = 5

Default format for percent pipe is as below. 
minIntegerDigits = 1
minFractionDigits = 0
maxFractionDigits = 3

angular percent pipe example

6. Decimal pipe

DecimalPipe is used to format a number as decimal number. It uses number keyword with pipe operator.

<h1>Amount {{number1}} as a decimal value</h1>
      <h2>
        {{number1 | number}}
       </h2>

    <h1>Amount {{number1}} as a decimal value</h1>
      <h2>
        {{number1 | number:'2.2-5'}}
      </h2>
{{number1 | number:'2.2-5'}}

Above syntax means you are going to represent number in a format as below.
minIntegerDigits = 2
minFractionDigits = 2
maxFractionDigits = 5

Default format for decimal pipe is as below. 
minIntegerDigits = 1
minFractionDigits = 0
maxFractionDigits = 3
angular decimal pipe example
7. Slice pipe

Slice pipe is used to slice your array when you are displaying data. For an example in my app.component.ts file  has an array named week. If I wanted to show only first three day of the week, I can use slice pipe.

week=["Sunday","Monday","Tuesday","Wednesday","Thursday","Friday","Saturday"]
<h1>All days in a week</h1>
    <div *ngFor="let day of week">
      {{day}}
    </div>

    <h1>First 3 day in a week</h1>
    <div *ngFor="let day of week|slice:0:3">
      {{day}}
    </div>
angular slice pipe example

Creating a custom Pipe

So far, we have studied different kind of angular built-in pipes that we can used to format our data based on the requirement. Now we will look in to how you can write your own custom pipe. If the built-in pipes in angular does not fit for your requirement you can create your own pipe. 

As an example, let us say I wanted transform integer numbers as below.

1000 -> 1k
1500 -> 1.5k
5000 -> 5k

Let us see how you can achieve this using your own custom pipe.

In my project folder I have create the new folder called pipe and I created the new .ts file named as formatNumber.

creating a custom pipe formatnumber_ts

Below code represent my code in the formatNumber.ts file.  To create Pipe you must import module Pipe from angular/core library.

import { Pipe } from '@angular/core';

@Pipe({
  name: 'format-number'
})
export class FormatNumberPipe{
    
}
After creating a pipe class you must declare it inside the app.module.ts file as below to use this new pipe in your application.

import { BrowserModule } from '@angular/platform-browser';
import { NgModule } from '@angular/core';

import { AppRoutingModule } from './app-routing.module';
import { AppComponent } from './app.component';
import { FormatNumberPipe } from './pipe/formatNumber';

@NgModule({
  declarations: [
    AppComponent,
    FormatNumberPipe
  ],
  imports: [
    BrowserModule,
    AppRoutingModule,
    
  ],
  providers: [],
  bootstrap: [AppComponent]
})
export class AppModule { }
To implement the custom pipe functionality you need to use @Pipe decorator and must implement the interface “PipeTransform” and override the method “transform()” as below.

import { Pipe, PipeTransform } from '@angular/core';

@Pipe({
name: 'formatNumber'
})
export class FormatNumberPipe implements PipeTransform{
    transform(n: number) : string {
        return (n /1000)+"K";
    }
}
In above code I have read the input number “n” and I have implemented the logic to return the output as per my requirement.

In my app.component.ts file has below array. Let us see what would be the out put after I apply my custom pipe to the values in the array.

arrayToTranform = [1000,1500,5000];

<h1>Before applying custom pipe</h1>
      <div *ngFor = "let number of arrayToTranform "> 
          {{number}}
      </div>

  <h1>After applying custom pipe</h1>
      <div *ngFor = "let number of arrayToTranform"> 
          {{number | formatNumber}}
      </div>
before and after apply angular custom pipe

Congratulations! You have successfully applied your custom pipes to format the numbers to match with your requirement. Once you go through this article you should be able to understand Angular built-in pipes and what is the purpose of having them and how you are going to use them.  Secondly you will be able to create your own pipe simply to transform the data based on the requirement. 

We will meet in another useful article like this sooner. GOOD LUCK 😊

Saturday, 23 January 2021

How to use Angular HttpClient and RxJS to consume REST API

January 23, 2021 0
Angular HttpClient and RxJS


Today I am going to discuss how you can interact with REST API services to load and manage data. 

Prerequisites

Before getting started, you need to have the below software installed on your development machine:

Node.js and npm. You can install both of them from the Node.js

Angular CLI  (You can install it from npm using: npm install -g @angular/cli)


Frontend applications needs to call backend services over http/https protocol to manage dynamic data. Best place to access data from backend APIs are service component. Once you defined your service class you can inject it in to component or another service to use the service methods. 

Angular Related Articles:

Angular provides the HttpClient service class in @angular/common/http module to interact with backend REST API services.

Using HttpClient request call you can easily handle your response and you can intercept your request and response. By intercepting the request, you can inject your security token or any other requested headers to all the service inside the one place. By intercepting the response, you can handle all the errors in a single place. I will explain interceptor concept in another chapter with more details. 

Today we will check how you can use HttpClient methods to do get data from service API. Get method of HTTP Client returns RxJS observable type and you can subscribe to the RxJS observable inside the component where you call the service method.

If you look at my flower store code in GitHub, you can see I have hard coded flower objects and put them into an array as below. 


  mySellingFlowers(){
    let rose = new flower();
    rose.name = "Rose";
    rose.price = 100;
    rose.availableQuantity = 1000;
    rose.isChecked = false;
    this. myFlowerList.push(rose);

    let lily = new flower();
    lily.name = "Lilly";
    lily.price = 80;
    lily.availableQuantity = 2000;
    lily.isChecked = false;
    this. myFlowerList.push(lily);

    let tulip = new flower();
    tulip.name = "Tulip";
    tulip.price = 100;
    tulip.availableQuantity = 2300;
    lily.isChecked = false;

    this. myFlowerList.push(tulip);

    let carnation = new flower();
    carnation.name = "Carnation";
    carnation.price = 50;
    carnation.availableQuantity = 1500;
    lily.isChecked = false;

    this. myFlowerList.push(carnation);

    let gerbera = new flower();
    gerbera.name = "Gerbera";
    gerbera.price = 50;
    gerbera.availableQuantity = 1500;
    lily.isChecked = false;

    this. myFlowerList.push(gerbera);

    let orchid = new flower();
    orchid.name = "Orchid";
    orchid.price = 50;
    orchid.availableQuantity = 1500;
    lily.isChecked = false;

    this. myFlowerList.push(orchid);

  }
  
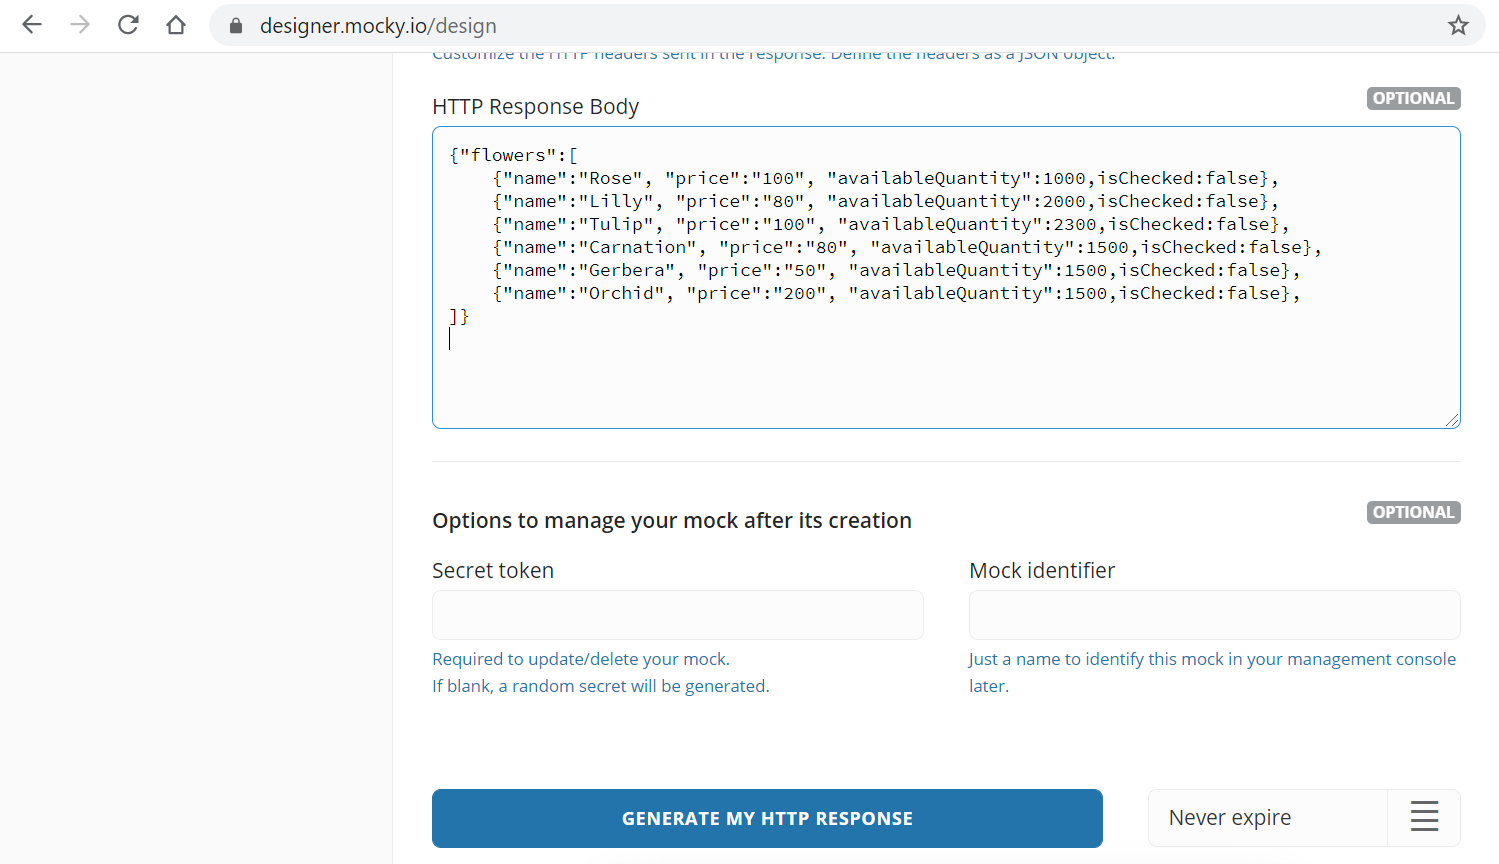
Today we will check how you can read flowers from backend REST API call. I am planning to use designer.mocky.io to mock my API call. To access list of flowers through API and to read it from Angular side that API should return an JOSN array. Therefor I will make a JSON array to define a response in my mock API as below.

{"flowers":[  
    {"name":"Rose", "price":"100", "availableQuantity":"1000","isChecked":false},    
    {"name":"Lilly", "price":"80", "availableQuantity":"2000","isChecked":false},  		
    {"name":"Tulip", "price":"100", "availableQuantity":"2300","isChecked":false},  	   
    {"name":"Carnation", "price":"80", "availableQuantity":"1500","isChecked":false}, 
    {"name":"Gerbera", "price":"50", "availableQuantity":"1500","isChecked":false},   
    {"name":"Orchid", "price":"200", "availableQuantity":"1500","isChecked":false}   
]
}
]}

https://designer.mocky.io/ to mock my API call

Click on the generate my http response button to get the access URL. In my case it is as below.

Click on the generate my http response button to get the access run.mocky.io/v3

Now let us see how you can access this URL and display data in html. As I said earlier best place to access the data layer is service class.

To generate the service, please run below CLI command in your command prompt. 

ng g s flower
ng g s flower command

Above command generate the default flower service as below.


import { Injectable } from '@angular/core';

@Injectable({
  providedIn: 'root'
})
export class FlowerService {

  constructor() { }
}

  
The @Injectable() decorator specifies that Angular can use this class with the Dependency Injection.

The metadata, providedIn: 'root', means that the FlowerService is visible throughout the application.
Now we will write a new method in a FlowerService class to access our API end point.

The HttpClient service in Angular 4.3+ is the successor to Angular 2's Http service. Instead of returning a Promise, its http.get() method returns an RxJS Observable object.

Therefore, to call our get API method I will import the HttpClient from Angualr/common/http and Observable module from RxJS. and then injected that to our service class as below.


import { Injectable } from '@angular/core';
import { HttpClient, HttpHeaders } from '@angular/common/http';
import { Observable } from 'rxjs';

@Injectable({
  providedIn: 'root'
})
export class FlowerService {

  constructor(private http:HttpClient) {}

    getFlowerList():Observable<any>{
      return this.http.get('https://run.mocky.io/v3/cee1c6e9-1491-4191-9054-ce7df1c1a500');
   }
}

  
getFlowerLIst() methods returns RxJS observable type and later in the landing component you can subscribe to access data.

To consume getFlowerList() method in our landing component we need to inject our service in to landing component through constructor and need to subscribe to the method.


constructor(private flowerService:FlowerService) { }
I have commented out my array with hard coded data and add the below codes to read data from service method.


this.flowerService.getFlowerList().subscribe(response=>{
      this.myFlowerList = response.flowers
    },
    err => console.error(err),
    () => console.log('done loading foods')
   )
I have added full code for landing component for you to refer. 


import { Component, EventEmitter, OnInit, Output, ViewEncapsulation } from '@angular/core';
import { flower } from '../../domain/flower';
import { DataService } from 'src/app/services/data.service';
import { FlowerService } from 'src/app/services/flower.service';

@Component({
  selector: 'app-landing',
  templateUrl: './landing.component.html',
  styleUrls: ['./landing.component.scss'],
 
})
export class LandingComponent implements OnInit {

  myFlowerList:flower[]=[];
  selectedFlowers: string[] =[];

  checkedList:string[]=[];
  searchText:string='';
  constructor(private dataService:DataService, private flowerService:FlowerService) { }

  ngOnInit() {
    this.mySellingFlowers();
    this.dataService.getSearchText().subscribe(response => {
      this.printSearchtext(response);
    })
  }

  printSearchtext(searchText){
    this.searchText = searchText;
  }

  printOrder(flowerName){
    if(this.selectedFlowers.indexOf(flowerName)<0){
      this.selectedFlowers.push(flowerName)
    }
    else{
      let index = this.selectedFlowers.indexOf(flowerName);
      this.selectedFlowers.splice(index,1);
    }

  }

  mySellingFlowers(){
    // let rose = new flower();
    // rose.name = "Rose";
    // rose.price = 100;
    // rose.availableQuantity = 1000;
    // rose.isChecked = false;
    // this. myFlowerList.push(rose);

    // let lily = new flower();
    // lily.name = "Lilly";
    // lily.price = 80;
    // lily.availableQuantity = 2000;
    // lily.isChecked = false;
    // this. myFlowerList.push(lily);

    // let tulip = new flower();
    // tulip.name = "Tulip";
    // tulip.price = 100;
    // tulip.availableQuantity = 2300;
    // lily.isChecked = false;

    // this. myFlowerList.push(tulip);

    // let carnation = new flower();
    // carnation.name = "Carnation";
    // carnation.price = 50;
    // carnation.availableQuantity = 1500;
    // lily.isChecked = false;

    // this. myFlowerList.push(carnation);

    // let gerbera = new flower();
    // gerbera.name = "Gerbera";
    // gerbera.price = 50;
    // gerbera.availableQuantity = 1500;
    // lily.isChecked = false;

    // this. myFlowerList.push(gerbera);

    // let orchid = new flower();
    // orchid.name = "Orchid";
    // orchid.price = 50;
    // orchid.availableQuantity = 1500;
    // lily.isChecked = false;

    // this. myFlowerList.push(orchid);

    this.flowerService.getFlowerList().subscribe(response=>{
      this.myFlowerList = response.flowers
    },
    err => console.error(err),
    () => console.log('done loading foods')
   )

  }

  trackFlowers(index,flower){
    return flower?flower.name:undefined
  }
}

  
The subscribe() method takes three arguments which are event handlers. They are called onNext, onError, and onCompleted. 

The onNext method will receive the HTTP response data

The onError event handler is called if the HTTP request returns an error code such as a 500. 

The onCompleted event handler executes after the Observable has finished returning all its data. 

myFlowerList array contains data return from the API call and using *ngFor you can iterate and display it in a HTML as below.


<div *ngFor="let flower of myFlowerList;trackBy:trackFlowers">
      <flower-card [title]="flower.name" (selectedFlower)="printOrder($event)"></flower-card>
</div>
To use the Angular HttpClient, we need to inject it into our app's dependencies in app.module.ts file as below.


imports: [
    BrowserModule,
    AppRoutingModule,
    CardModule,
    CheckboxModule,
    CommonModule,
    FormsModule,
    InputTextModule,
    HttpClientModule
    ],
Unless it gives you below error.

core.js:7187 ERROR Error: Uncaught (in promise): NullInjectorError: StaticInjectorError(AppModule)[HttpClient]: 
  StaticInjectorError(Platform: core)[HttpClient]: 
    NullInjectorError: No provider for HttpClient!
NullInjectorError: StaticInjectorError(AppModule)[HttpClient]:
I have added app.module.ts file code after adding the dependency and you can check full code to the app by accessing GitHub.


import { BrowserModule } from '@angular/platform-browser';
import { NgModule } from '@angular/core';

import { AppRoutingModule } from './app-routing.module';
import { AppComponent } from './app.component';
import { LandingComponent } from './modules/landing/landing.component';
import { HomeComponent } from './modules/home/home.component';
import { CardModule } from 'primeng/card';
import {CheckboxModule} from 'primeng/checkbox';
import { CommonModule } from '@angular/common';
import { FormsModule }    from '@angular/forms';
import {InputTextModule} from 'primeng/inputtext';
import { FlowerCardComponent } from './modules/cards/flower-card/flower-card.component';
import { HttpClientModule } from '@angular/common/http';

@NgModule({
  declarations: [
    AppComponent,
    LandingComponent,
    HomeComponent,
    FlowerCardComponent
  ],
  imports: [
    BrowserModule,
    AppRoutingModule,
    CardModule,
    CheckboxModule,
    CommonModule,
    FormsModule,
    InputTextModule,
    HttpClientModule
    
  ],
  providers: [],
  bootstrap: [AppComponent]
})
export class AppModule { }
Once you load the app it will show same data as before by getting the data from backend API call.

My Flower Store Angular App

Conclusion

In this tutorial, we used HttpClient and RxJS modules to retrieves data from a REST API using the get() method of HttpClient. First I have explained how you can generate service component using the CLI command. Then I have described how  to subscribe to the RxJS Observable returned by the get() method and how to use the *ngFor directive to iterate over fetched data in the template. 

Monday, 28 December 2020

Angular share data between parent child components using @Input and @Output decorators

December 28, 2020 0
Angular share data between parent child components


Last chapter we have discussed how we can share data between two unrelated components using behavioral subjects in Angular 8. Today I am going to explain how you can make an interaction between parent and child component using Angular.

Before moving forward, I will generate one component in my flower store angular app. Flower store is the app we used to demonstrate the angular concept talked in series of chapters in this blog. 

To generate the component, please run below ng CLI command in your command prompt. 

ng g c flower-card

Above command will generate the flower-card.component.ts and corresponding html and CSS files as below.


run cli command ng g c flower-card to generate the component in angular

Angular Related Articles:


In our flower app component landing page view has cards for each flower as below.

landing page of my flower store angular app


Currently your landing.component.html includes all the code to display cards. Below commented lines used to shows cards for each flower. 


<h1>Welcome to my flower store</h1>

    <div *ngFor="let flower of myFlowerList;trackBy:trackFlowers">
        <!-- <p-card header="{{flower.name}}"  [style]="{width: '360px','float':'left','margin-bottom': '2em','margin-right': '2em','background-color':'light-pink'}" styleClass="p-card-shadow">
                <img alt="Card" width="100" height="100" src="assets/stock/{{flower.name}}.jpg">
            <p>Lorem ipsum dolor sit amet, consectetur adipisicing elit. Inventore sed consequuntur error repudiandae numquam deserunt
                quisquam repellat libero asperiores earum nam nobis, culpa ratione quam perferendis esse, cupiditate neque quas!</p>
                <p-checkbox name="flower" [style]="{'margin-top': '2em'}" value="{{flower.name}}" label="Order Now" [(ngModel)]="selectedFlowers"></p-checkbox>
             
            </p-card> -->
    </div>

    <div>Your search text is: {{searchText}}</div>

    <ul>
        <li *ngFor="let selectedFlower of selectedFlowers">
            <input id="select-user" type="checkbox" (change)="onCheckboxChange(selectedFlower,$event)"> {{selectedFlower}}

        </li>
    </ul>


I am going to replace commented lines by adding selected tags of flower-card component and I am going to move card displaying logic in to flower-card.component.html.

<h1>Welcome to my flower store</h1>

    <div *ngFor="let flower of myFlowerList;trackBy:trackFlowers">
      <flower-card></flower-card>
    </div>

    <div>Your search text is: {{searchText}}</div>

    <ul>
        <li *ngFor="let selectedFlower of selectedFlowers">
            <input id="select-user" type="checkbox" (change)="onCheckboxChange(selectedFlower,$event)"> {{selectedFlower}}

        </li>
    </ul>

<flower-card> is a selector tag in the flower-card component file. Below is the flower-card.component.ts file code for you to understand.

import { Component, OnInit } from '@angular/core';

@Component({
  selector: 'flower-card', // selector 
  templateUrl: './flower-card.component.html',
  styleUrls: ['./flower-card.component.scss']
})
export class FlowerCardComponent implements OnInit {

  constructor() { }

  ngOnInit() {
  }
}


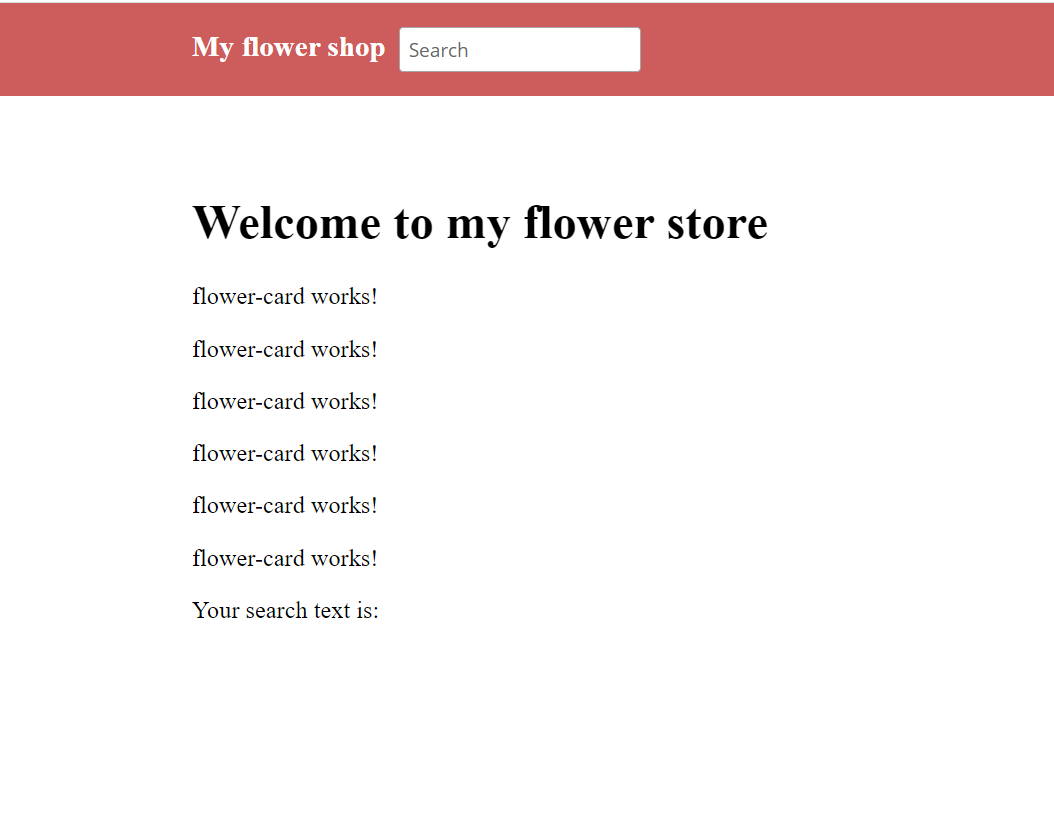
Now if I run my app you will see below screen because I still did not add any codes to flower-card.component.html file to shows flowers as a card.

flower-card.component.html file to shows flowers as a card

Pass data between parent component to child component in Angular

Now let’s focus on how to pass data from parent component (landing.component.ts) to child component (flower-card.component.ts). 

Now my flower array is defined inside the parent component and I am going to display data in child component. Now I must find a way to transfer data from parent to child component. 

In this case, we send the data from the parent component to the child component using an attribute. This attribute can then be accessed within the child component using the @input decorator.

Properties I need to pass from parent to child are only title or name of the flower since I used dummy text to display description.

I am using the title to read the image also. 

Now let us check how we can bind the attributes to child component from parent component below. There are two ways you can bind data.

<flower-card title="{{flower.name}}"></flower-card>

OR

<flower-card [title]="flower.name"></flower-card>

You can bind another attribute like description as below.

<flower-card [title]="flower.name" [description]="flower.description"></flower-card>

<h1>Welcome to my flower store</h1>

    <div *ngFor="let flower of myFlowerList;trackBy:trackFlowers">
      <!-- <flower-card title="{{flower.name}}"></flower-card> -->
      <flower-card [title]="flower.name"></flower-card>
   </div>

    <div>Your search text is: {{searchText}}</div>

    <ul>
        <li *ngFor="let selectedFlower of selectedFlowers">
            <input id="select-user" type="checkbox" (change)="onCheckboxChange(selectedFlower,$event)"> {{selectedFlower}}

        </li>
    </ul>


Now we have banded data from parent component to child component. Let us see how we can read these data from child component <flower-card-component>

To read data you should defined @Input() decorators. You need to import Input decorator from @angular/core to use @Input.

@Input() title:string =''

flower-card.component.ts file code.

import { Component, Input, OnInit } from '@angular/core';

@Component({
  selector: 'flower-card', // selector 
  templateUrl: './flower-card.component.html',
  styleUrls: ['./flower-card.component.scss']
})
export class FlowerCardComponent implements OnInit {

  constructor() { }
  
  @Input() title:string =''
  
  ngOnInit() {
  
  }
}}

Then I will copy paste commented code in parent component html (landing.component.html) file to child component html file and alter the file to display @input type variable value. (flower-card-component.html).

Since I am using PrimeNG component to display card and checkbox I will import PrimeNG modules in flower-card.component.ts file. Then I will move card style related code from landing.component.sccs to flower-card.component.scss file.

flower-card.component.html code:

<p-card header="{{title}}"  [style]="{width: '360px','float':'left','margin-bottom': '2em','margin-right': '2em','background-color':'light-pink'}" styleClass="p-card-shadow">
    <img alt="Card" width="100" height="100" src="assets/stock/{{title}}.jpg">
    <p>Lorem ipsum dolor sit amet, consectetur adipisicing elit. Inventore sed consequuntur error repudiandae numquam deserunt
        quisquam repellat libero asperiores earum nam nobis, culpa ratione quam perferendis esse, cupiditate neque quas!</p>
    <p-checkbox name="flower" [style]="{'margin-top': '2em'}" value="{{title}}" label="Order Now" [(ngModel)]="selectedFlowers"></p-checkbox>
</p-card>

flower-card.component.scss code:

.ui-card-title{
    background-color: lightpink !important;
}

.ui-chkbox-label{
    vertical-align:bottom;
}

Pass data between child component to parent component in Angular

In our previous application when user click on the checkboxes in each card checkbox value is bonded to the array using ngModel. So selected flower names will be stored in an array and you can directly print the value by iterating the array.

Now our checkbox is in child component and our printing logic is in parent component. So, you need to find a way to print the value when and checkbox checked event called in the child component.

To have child to parent communication we can capture the change in data due to any event within the child component. This event is then propagated to the parent component using the @Output decorator and Eventemitter.

First, I will define the object as below.

@Output() selectedFlower = new EventEmitter<string>();

To use @Output and EventEmitter you must import EventEmitter and Output component from @angular/core library.

In flower-card.component.html file I have added the check box change event. So, I can capture that event and emit it value to parent component as below. Since I used PrimeNG checkbox you must use (onChange) event.

<p-card header="{{title}}"  [style]="{width: '360px','float':'left','margin-bottom': '2em','margin-right': '2em','background-color':'light-pink'}" styleClass="p-card-shadow">
    <img alt="Card" width="100" height="100" src="assets/stock/{{title}}.jpg">
    <p>Lorem ipsum dolor sit amet, consectetur adipisicing elit. Inventore sed consequuntur error repudiandae numquam deserunt
        quisquam repellat libero asperiores earum nam nobis, culpa ratione quam perferendis esse, cupiditate neque quas!</p>
    <p-checkbox name="flower" [style]="{'margin-top': '2em'}" value="{{title}}" label="Order Now" (onChange)="selectCheckBox($event,title)" [(ngModel)]="selectedFlowers"></p-checkbox>
</p-card>

Then I am going to define the selectCheckBox event in flower-card.component.ts to emit the selected value.

selectCheckBox(value,name){
    this.selectedFlower.emit(name);
  }

import { Component, EventEmitter, Input, OnInit, Output, ViewEncapsulation } from '@angular/core';
import {CardModule} from 'primeng/card';
import {CheckboxModule} from 'primeng/checkbox';

@Component({
  selector: 'flower-card', // selector 
  templateUrl: './flower-card.component.html',
  styleUrls: ['./flower-card.component.scss'],
  encapsulation: ViewEncapsulation.None
})
export class FlowerCardComponent implements OnInit {

  constructor() { }

  @Input() title:string =''
  selectedFlowers: string[] = [];
  @Output() selectedFlower = new EventEmitter<string>();

  
  ngOnInit() {
  
  }

  selectCheckBox(value,name){
    this.selectedFlower.emit(name);
  }
}

Now we have implemented the code in child component. Let’s see how you can capture this emitted value and print it in a parent component.

For that you must bind the emitted event in a child component selected tag as below.

<flower-card [title]="flower.name" (selectedFlower)="printOrder($event)"></flower-card>

Here the bind event name should be same as the @Output name we defined in child component.
So now whenever user click on child component checkboxes that event is emitted to the parent component and printOrder() method defined in parent component will be executed. $event argument will contain the emitted value.

Inside the printOrder() method I have implemented the logic to check values is exist, if exist value will be remove from the array and if not value will be added to the array.

printOrder(flowerName){
    if(this.selectedFlowers.indexOf(flowerName)<0){
      this.selectedFlowers.push(flowerName)
    }
    else{
      let index = this.selectedFlowers.indexOf(flowerName);
      this.selectedFlowers.splice(index,1);
    }
}

Parent component code:

<h1>Welcome to my flower store</h1>

    <div *ngFor="let flower of myFlowerList;trackBy:trackFlowers">
      <flower-card [title]="flower.name" (selectedFlower)="printOrder($event)"></flower-card>
       </div>

    <div>Your have selected: {{searchText}}</div>

    <ul>
        <li *ngFor="let selectedFlower of selectedFlowers">
             {{selectedFlower}}

        </li>
    </ul>


import { Component, EventEmitter, OnInit, Output, ViewEncapsulation } from '@angular/core';
import { flower } from '../../domain/flower';
import { DataService } from 'src/app/services/data.service';

@Component({
  selector: 'app-landing',
  templateUrl: './landing.component.html',
  styleUrls: ['./landing.component.scss'],
 
})
export class LandingComponent implements OnInit {

  myFlowerList:flower[]=[];
  selectedFlowers: string[] =[];

  checkedList:string[]=[];
  searchText:string='';
  constructor(private dataService:DataService) { }

  ngOnInit() {
    this.mySellingFlowers();
    this.dataService.getSearchText().subscribe(response => {
      this.printSearchtext(response);
    })
  }

  printSearchtext(searchText){
    this.searchText = searchText;
  }

  printOrder(flowerName){
    if(this.selectedFlowers.indexOf(flowerName)<0){
      this.selectedFlowers.push(flowerName)
    }
    else{
      let index = this.selectedFlowers.indexOf(flowerName);
      this.selectedFlowers.splice(index,1);
    }

  }

  mySellingFlowers(){
    let rose = new flower();
    rose.name = "Rose";
    rose.price = 100;
    rose.availableQuantity = 1000;
    rose.isChecked = false;
    this. myFlowerList.push(rose);

    let lily = new flower();
    lily.name = "Lilly";
    lily.price = 80;
    lily.availableQuantity = 2000;
    lily.isChecked = false;
    this. myFlowerList.push(lily);

    let tulip = new flower();
    tulip.name = "Tulip";
    tulip.price = 100;
    tulip.availableQuantity = 2300;
    lily.isChecked = false;

    this. myFlowerList.push(tulip);

    let carnation = new flower();
    carnation.name = "Carnation";
    carnation.price = 50;
    carnation.availableQuantity = 1500;
    lily.isChecked = false;

    this. myFlowerList.push(carnation);

    let gerbera = new flower();
    gerbera.name = "Gerbera";
    gerbera.price = 50;
    gerbera.availableQuantity = 1500;
    lily.isChecked = false;

    this. myFlowerList.push(gerbera);

    let orchid = new flower();
    orchid.name = "Orchid";
    orchid.price = 50;
    orchid.availableQuantity = 1500;
    lily.isChecked = false;

    this. myFlowerList.push(orchid);

  }

  trackFlowers(index,flower){
    return flower?flower.name:undefined
  }
}

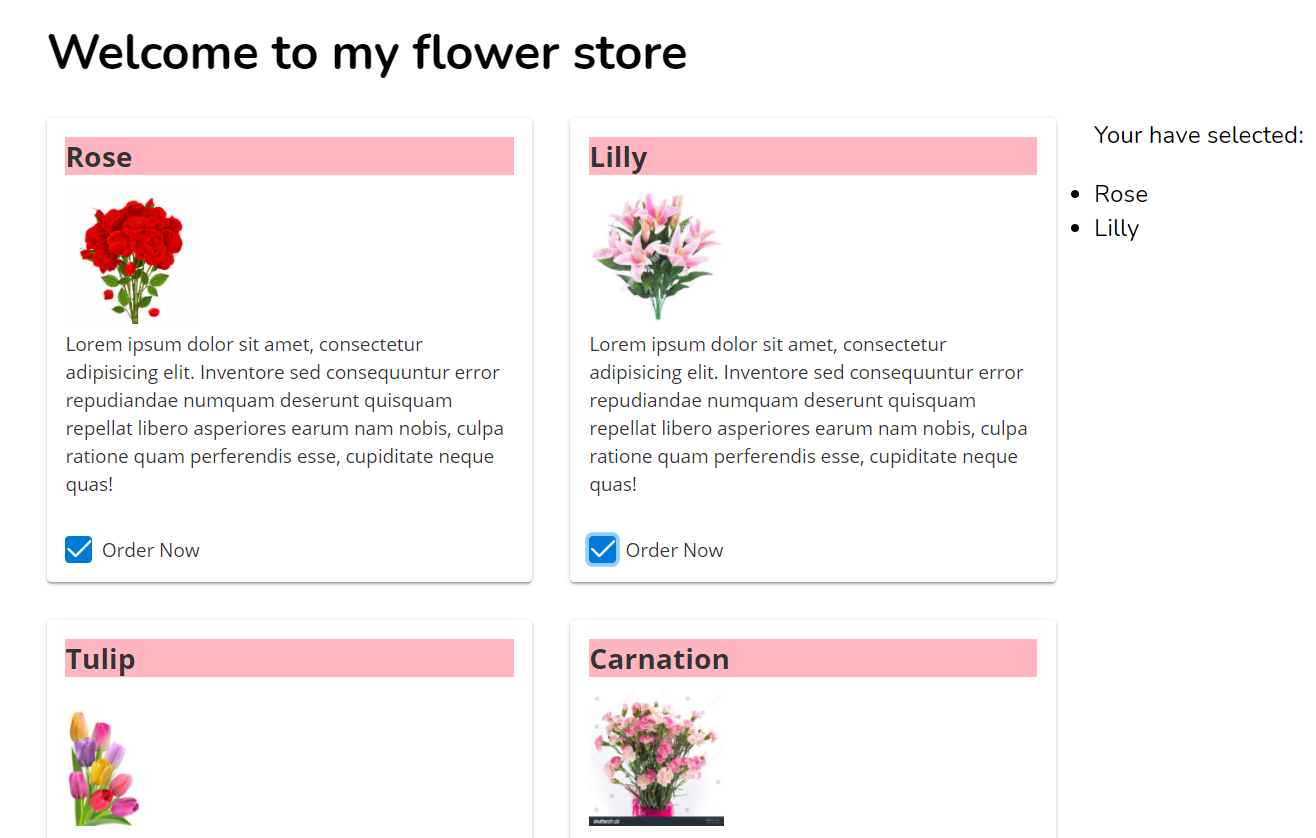
Now see the magic in your browser by clicking on the checkboxes.

click on checkboxes to select items in store


You can find complete source code related to the angular implementation we have done so far here in GitHub.


Friday, 18 December 2020

How to share data between components in angular

December 18, 2020 0


sharing data between unrelated components angular

Today I am going to talk about how we can make interaction between two different components in angular.

There are two main approaches that we can follow.

1. If the two components are not relative, then you can use behavioral subjects to share data and trigger the event in one component, based on the value change in another component.

2. If the component is a child component of another component, then you can share data using @Input and @output directives

Today in this chapter we will discuss on the first approach.

How you can use Behavior subject to share between two components. 

The BehaviorSubject holds the value that needs to be shared with other components.

I will explain the concept using our flower store app.

First, I will add PrimeNG text filed to the app.component.html file.

To add the text field you have to import it in app.module.ts and also in app.component.ts file


import { BrowserModule } from '@angular/platform-browser';
import { NgModule } from '@angular/core';

import { AppRoutingModule } from './app-routing.module';
import { AppComponent } from './app.component';
import { LandingComponent } from './modules/landing/landing.component';
import { HomeComponent } from './modules/home/home.component';
import { CardModule } from 'primeng/card';
import {CheckboxModule} from 'primeng/checkbox';
import { CommonModule } from '@angular/common';
import { FormsModule }    from '@angular/forms';
import {InputTextModule} from 'primeng/inputtext';

@NgModule({
  declarations: [
    AppComponent,
    LandingComponent,
    HomeComponent
  ],
  imports: [
    BrowserModule,
    AppRoutingModule,
    CardModule,
    CheckboxModule,
    CommonModule,
    FormsModule,
    InputTextModule
    
  ],
  providers: [],
  bootstrap: [AppComponent]
})
export class AppModule { }
  
Also need to import it inside app.component.ts. The ViewEncapsulation.None line need to add if you want to override PrimeNG styles inside your component.css file.


import { Component, ViewEncapsulation } from '@angular/core';
import {InputTextModule} from 'primeng/inputtext';

@Component({
  selector: 'app-root',
  templateUrl: './app.component.html',
  styleUrls: ['./app.component.scss'],
  encapsulation: ViewEncapsulation.None

})
export class AppComponent {
  title = 'my-flower-store';
  searchText:string='';
  

In app.component.html file I have added the PrimeNG text filed as below.


<header>
  <div class="container">
    <a href="" class="logo">My flower shop</a>
  <span [style]="{'padding-left':'10px'}" >
      <input type="text" pInputText placeholder="Search" [(ngModel)]="searchText" />
  </span>
    <nav>
      <ul>
        <li><a href="" routerLink="/">Landing</a></li>
        <li><a href="" routerLink="/home">Home</a></li>
      </ul>
    </nav>
  </div>
</header>

<div class="container">
  <router-outlet></router-outlet>
</div>
  
Now once I refresh my browser, I can see below view which has the input text filed to enter search text.

input text filed to enter search text


Now what I am trying to do is I am going to display search text in my landing.component.html file.

Here the challenge I have is my search filed is in one component (app.component.html) and my flower cards in another component (landing.component.html). These two components don’t have any relationship.

How can I get the search text value from app.component.ts to landing.component.ts.

Here comes the angel Behavior Subject to support me.

Let me explain what you need to do to share the search text value using behavior subject concept.

First, I am going to generate the service class. To generate go inside the service folder and type below command.

>ng g s data

‘g’ and ‘s’ means generate service and then the ‘data’ is service name. This will create two files inside src/app/service folder


data.service.spec.ts and data.service.ts in src/app/service folder


Inside the data service class, you can define the BehaviorSubject variable from string type to hold search text value.

Inside the constructor I have initialize it with empty string.

private searchText: BehaviorSubject<string>;

  constructor() {
    this.searchText = new BehaviorSubject<string>('');

   }
  
Then I am going to add getters and setters as below.


  public getUserName() {
    return this.userName.asObservable();
  }

  public changeUserName(newUserName) {
    this.userName.next(newUserName);
  

Now we have done with implementing shared data service class to handle behavioral subjects. Please see service code below.


import { Injectable } from '@angular/core';
import { BehaviorSubject } from 'rxjs';

@Injectable({
  providedIn: 'root'
})

export class DataService {

  private searchText: BehaviorSubject<string>;

  constructor() {
    this.searchText = new BehaviorSubject<string>('');
   }

   public getSearchText() {
    return this.searchText.asObservable();
  }

  public setSearchText(searchText) {
    this.searchText.next(searchText);
  }
}
  

Now I can subscribe to this getSearchText() method from my landing.component.ts where I want to print new search text.

I need to inject my service class to the landing.component.ts file through the constructor.

Before inject I have imported the data.service.ts in my landing.component.ts file.


import { Component, OnInit, ViewEncapsulation } from '@angular/core';
import { flower } from '../../domain/flower';
import {CardModule} from 'primeng/card';
import {CheckboxModule} from 'primeng/checkbox';
import { DataService } from 'src/app/services/data.service';

@Component({
  selector: 'app-landing',
  templateUrl: './landing.component.html',
  styleUrls: ['./landing.component.scss'],
  encapsulation: ViewEncapsulation.None
})

export class LandingComponent implements OnInit {

  myFlowerList:flower[]=[];
  selectedFlowers: string[] = [];
  checkedList:string[]=[];
  searchText:string='';
  constructor(private dataService:DataService) { }

  ngOnInit() {
    this.mySellingFlowers();
    this.dataService.getSearchText().subscribe(response => {
      this.printSearchtext(response);
    })
  }

  printSearchtext(searchText){
    this.searchText = searchText;
  }

  mySellingFlowers(){
    let rose = new flower();
    rose.name = "Rose";
    rose.price = 100;
    rose.availableQuantity = 1000;
    rose.isChecked = false;
    this. myFlowerList.push(rose);

    let lily = new flower();
    lily.name = "Lilly";
    lily.price = 80;
    lily.availableQuantity = 2000;
    lily.isChecked = false;
    this. myFlowerList.push(lily);

    let tulip = new flower();
    tulip.name = "Tulip";
    tulip.price = 100;
    tulip.availableQuantity = 2300;
    lily.isChecked = false;

    this. myFlowerList.push(tulip);

    let carnation = new flower();
    carnation.name = "Carnation";
    carnation.price = 50;
    carnation.availableQuantity = 1500;
    lily.isChecked = false;

    this. myFlowerList.push(carnation);

    let gerbera = new flower();
    gerbera.name = "Gerbera";
    gerbera.price = 50;
    gerbera.availableQuantity = 1500;
    lily.isChecked = false;

    this. myFlowerList.push(gerbera);

    let orchid = new flower();
    orchid.name = "Orchid";
    orchid.price = 50;
    orchid.availableQuantity = 1500;
    lily.isChecked = false;

    this. myFlowerList.push(orchid);

  }

  trackFlowers(index,flower){
    return flower?flower.name:undefined
  }
}
  

Once you subscribe to the behavior subject whenever it value change it will execute the printSearchtext() method.

Here I have print it in landing.component.html file as below.

<div>Your search text is: {{searchText}}</div>

When user type new search term we must update behavior subject.

I added below code in app.component.ts file to do that. Here also you need to inject your service class.

Then call setSearchText() method to update new values.

Here is the code in app.component.html. I have added input event where it triggers whenever user types something on the text filed.


  <header>
  <div class="container">
    <a href="" class="logo">My flower shop</a>
  <span [style]="{'padding-left':'10px'}" >
    
      <input type="text" pInputText placeholder="Search" (input)="updateSearchText()" [(ngModel)]="searchText" />
  </span>
    <nav>
      <ul>
        <li><a href="" routerLink="/">Landing</a></li>
        <li><a href="" routerLink="/home">Home</a></li>
      </ul>
    </nav>
  </div>
</header>

<div class="container">
  <router-outlet></router-outlet>
</div>

In app.component.ts I have defined the updateSearchText() method and call data service to update behavior subject.

Import the data.service and inject it through constructor. This is called Dependency Injection in Angular. I will explain it in detail future.


import { Component, ViewEncapsulation } from '@angular/core';
import {InputTextModule} from 'primeng/inputtext';
import { DataService } from './services/data.service';

@Component({
  selector: 'app-root',
  templateUrl: './app.component.html',
  styleUrls: ['./app.component.scss'],
  encapsulation: ViewEncapsulation.None

})
export class AppComponent {
  title = 'my-flower-store';
  searchText:string='';

  constructor(private dataService:DataService){

  }

  updateSearchText(){
    this.dataService.setSearchText(this.searchText);
  }
}
  

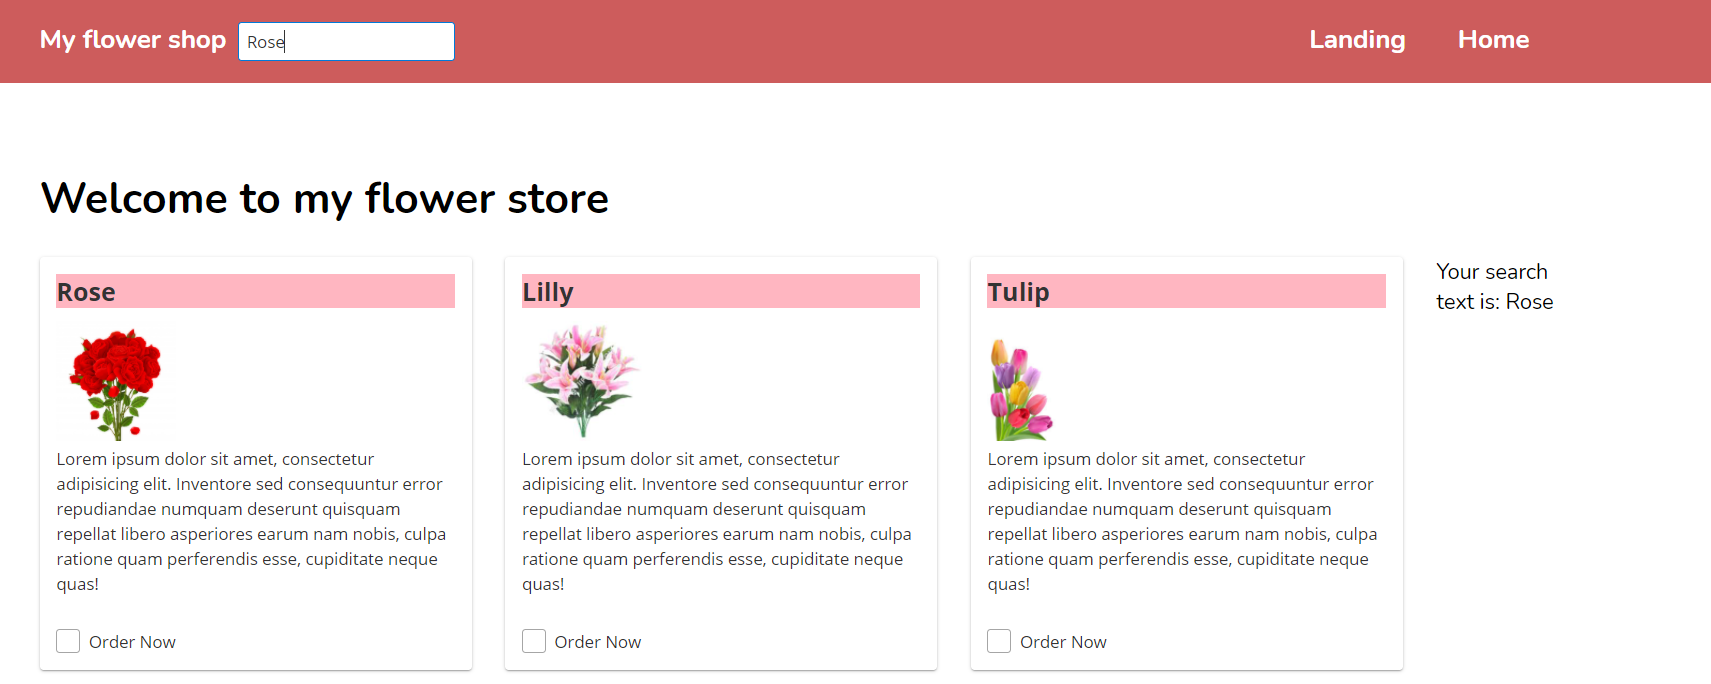
Now you can see the magic happens in your browser.

how you can share data between parent child components

Good Luck with learning concept of sharing data between unrelated components. Next chapter we will see how you can share data between parent child components.